How to Cook Bacon in the Oven in 10 Essential Steps
To cook bacon in the oven, start by preheating your oven to 400°F. This method ensures even cooking and a crispy finish.
Line a baking sheet with foil or parchment paper for easy cleanup.
Choose center-cut or thick-cut bacon for the best texture and flavor. Arrange the slices on the sheet without overlapping to allow air circulation.
Place the baking sheet on the middle rack of the oven.
Bake the bacon for 14-18 minutes, checking at 12 minutes to monitor crispiness. Remove the bacon once it reaches your desired crispness.
Drain the slices on paper towels to absorb excess grease.
If you want, save the bacon grease for cooking other dishes. Store any leftover bacon properly in the refrigerator.
When reheating, do so gently to maintain the best flavor and texture.
Keep going to discover tips for perfect bacon every time.
Key Takeaways
- Preheat oven to 400°F for even cooking and crispy bacon.
- Line a baking sheet with foil or parchment paper for easy cleanup.
- Arrange bacon slices in a single layer without overlapping.
- Bake for 14-18 minutes, checking around 12 minutes for desired crispiness.
- Transfer bacon to paper towel-lined plate to drain excess grease before serving.
Gather Your Ingredients and Tools
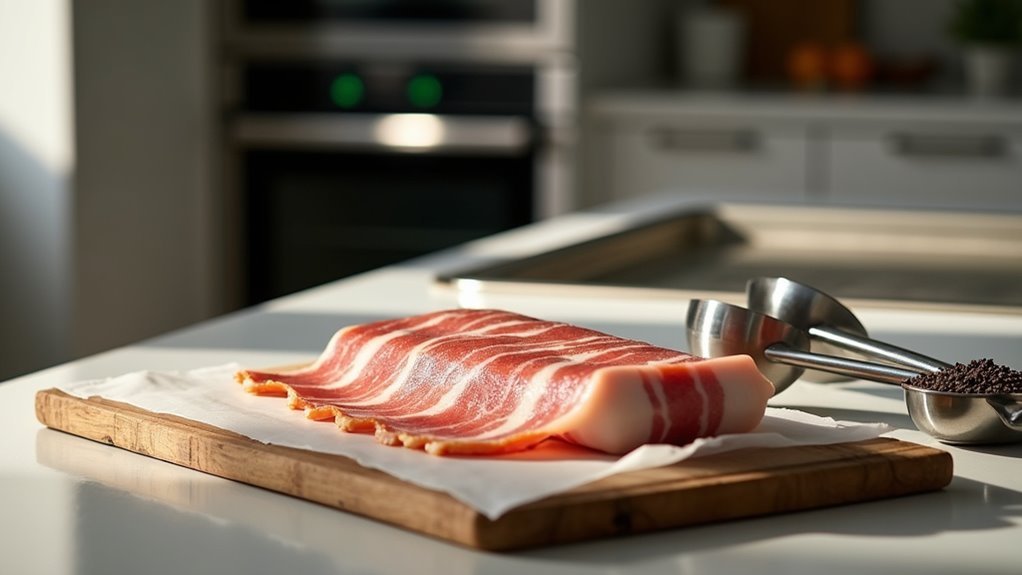
To get started, you’ll need one 16-ounce package of your favorite bacon—center-cut or thick-cut works best for even cooking. Next, grab a large baking sheet that can fit up to a pound of bacon comfortably. Line it with aluminum foil to make cleanup a breeze.
If you want extra-crispy results, consider placing a metal cooling rack on the baking sheet to elevate the bacon, allowing heat to circulate evenly. Keep a pair of kitchen tongs handy; they’re useful if you plan to flip the bacon during cooking, especially when using a preheated oven. Finally, have a plate lined with paper towels ready to drain the bacon once it’s done.
For best results, preheat your oven to 400°F before placing the bacon inside.
With these tools and ingredients, you’re set for perfectly cooked bacon straight from the oven.
Choose the Right Bacon for Baking
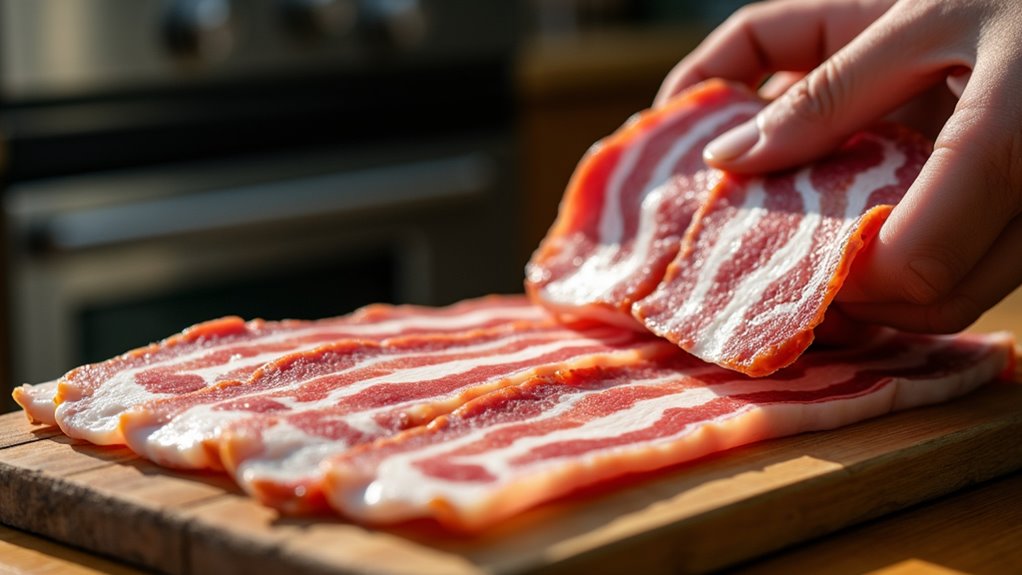
When choosing bacon for baking, center cut is your best bet since its even thickness cooks more consistently. Thick-cut bacon works too, but you’ll need to add a few extra minutes in the oven.
Whatever you pick, try to keep the slices uniform so they crisp evenly.
Center Cut Preference
Three key reasons make center cut bacon the best choice for baking: its even thickness guarantees uniform cooking, it crisps up consistently, and it strikes a perfect balance between flavor and texture. When you use center cut bacon, you’re ensuring every slice cooks evenly without parts burning or staying chewy.
Laying the slices in a single layer without overlapping is essential for ideal results, as it allows heat to circulate freely and achieve that perfect crispiness.
- Enjoy perfectly crisp bacon every time
- Avoid frustrating burnt or undercooked spots
- Savor balanced flavor and texture in each bite
- Save time guessing cook times for uneven slices
- Impress with beautifully cooked bacon on every tray
Choose center cut bacon for consistent, delicious oven-baked results.
Thick vs. Regular
Although both thick and regular bacon can yield delicious oven-cooked results, choosing the right cut makes a significant difference in cooking time and texture. Regular bacon typically takes about 14 minutes at 400°F, while thick-cut bacon needs around 18 minutes due to its greater thickness. When cooking bacon in the oven, you’ll want to add an extra 5-10 minutes for thick-cut bacon to achieve consistent crispiness.
Remember to arrange your bacon in a single layer without overlapping to guarantee even cooking and avoid steaming. Whether you pick thick-cut bacon or regular bacon, opting for center cut slices helps maintain uniform thickness, which is key to getting perfectly oven-baked bacon every time.
Consistent Thickness Importance
Consistency in bacon thickness plays an essential role in achieving perfectly cooked strips every time. When you choose bacon with an even thickness, like center cut, you guarantee consistent cooking results and reduce the chances of uneven crispiness.
Thick-cut bacon is delicious but demands extra cooking time due to slower cooking rates. Mixing different thicknesses on the same sheet leads to uneven doneness, which can be frustrating.
For best texture, pick bacon that matches your preference and cook accordingly.
- Enjoy evenly crisp bacon every time
- Avoid frustrating undercooked or burnt spots
- Savor the perfect balance between chewiness and crunch
- Save time by knowing your bacon’s cooking rates
- Relish consistent texture that satisfies your cravings
Preheat Your Oven to the Perfect Temperature

When you preheat your oven to 400°F, you set the stage for perfectly crispy bacon that cooks evenly. A preheated oven guarantees the bacon cooks consistently, promoting even crispiness across each slice. While some prefer starting with a cold oven to render fat slowly, using an oven to 400°F assures thorough cooking and quick caramelization, especially for candied bacon.
Just make certain your oven reaches the right temperature before putting the bacon in. Keep an eye on it, as cooking at this heat can cause burning if left too long. Depending on your bacon’s thickness and how crispy you want it, you might need to adjust the temperature or cooking time slightly.
A preheated oven is key to achieving that ideal balance of crisp and chew.
Prepare the Baking Sheet With Liner
To get started, line one large baking sheet with parchment paper or aluminum foil, leaving an overhang on all sides for easy cleanup. This simple step saves you from scrubbing grease later and keeps your kitchen spotless. Using parchment paper helps prevent sticking, while aluminum foil makes cleanup a breeze.
Line your baking sheet with parchment or foil, leaving edges overhanging for easy cleanup and no sticky mess.
If you want extra crispy bacon, consider placing a metal cooling rack on top so grease drips away from the bacon slices. Remember, a single large baking sheet fits up to 1 pound of bacon, ensuring even cooking without overcrowding.
- Enjoy hassle-free cleanup
- Keep bacon slices intact
- Achieve perfectly crispy bacon
- Prevent sticking and burning
- Cook evenly every time
Preparing your baking sheet right is key to delicious oven-cooked bacon.
Arrange Bacon Slices Without Overlapping
Place each bacon slice in a single layer on your baking sheet, making certain they don’t overlap. This step is essential to arrange bacon slices evenly, preventing overlapping that leads to uneven cooking. When the slices overlap, some parts stay chewy while others get crispy.
Using a large baking sheet, you can fit up to 1 pound of bacon without crowding, guaranteeing even cooking and crispy bacon throughout.
| Tip | Reason |
|---|---|
| Use a large baking sheet | Fits more slices without overlapping |
| Single layer | Guarantees even heat distribution |
| Avoid overlapping | Prevents uneven cooking and soggy spots |
Decide Whether to Use a Rack or Not
Once you’ve arranged your bacon slices without overlapping, you’ll need to decide if you want to use an oven-safe rack. Using a rack lets heat circulate beneath the bacon strips, helping them cook evenly and develop a satisfying crispy texture. Grease drips onto the baking sheet below, so your bacon won’t sit in fat.
However, if you skip the rack and place bacon directly on the baking sheet, you’ll want to flip the strips halfway through to avoid uneven cooking. This method can yield a more tender bite but needs extra attention to avoid burning.
- Achieve perfectly crispy bacon every time
- Maximize space by layering bacon on a rack
- Avoid greasy, soggy strips
- Choose tenderness over crispiness
- Simplify cleanup with less grease pooling
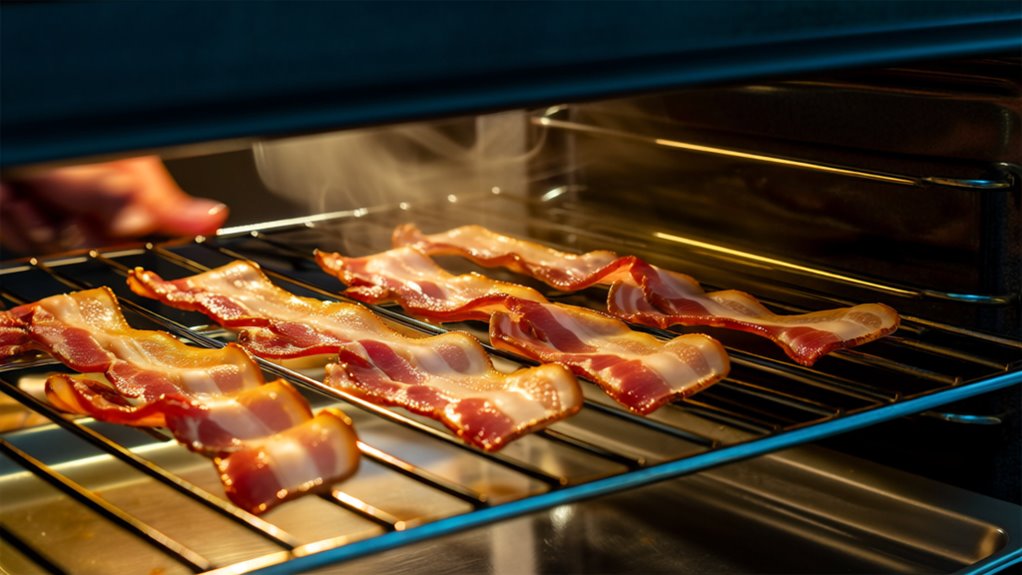
Place the Baking Sheet in the Oven
Set your oven to 400°F and let it fully preheat before sliding the baking sheet inside. Make certain your bacon slices are laid out in a single layer on the baking sheet without overlapping to guarantee even cooking. If you’re using a metal cooling rack on top of the baking sheet, place it in the oven as well—this helps grease drip away, resulting in extra crispy bacon.
Once the oven is preheated, carefully slide the baking sheet onto the middle rack for ideal heat distribution. Begin checking the bacon after about 12 minutes to gauge its crispiness, as cooking times can vary slightly. This step is vital to prevent overcooking and to achieve perfectly crispy bacon every time.
Monitor Cooking Time and Check Crispiness
Start checking your bacon around the 12-minute mark to prevent overcooking. Regular bacon usually takes about 14 minutes, while thick-cut may need closer to 18.
Keep an eye on the crispiness, and remember it’ll continue to crisp slightly after you take it out.
Timing Guidelines
Cooking bacon in the oven usually takes between 14 and 18 minutes, depending on the thickness and your preferred level of crispiness. If you’re using the cold oven method, expect about 20 minutes total, adjusting for thickness. Start checking your bacon around 12 minutes to avoid overcooking.
Remember, cooking time varies, so keep an eye on it to achieve perfectly crispy bacon. Once done, transfer the strips to paper towels to drain grease and finish crisping.
- The sizzle as bacon starts to cook fills your kitchen with irresistible aroma
- Watching bacon edges turn golden and curl is pure satisfaction
- Timing it just right means no burnt surprises
- The anticipation of that first crispy bite is worth every second
- Knowing you nailed the cooking time boosts your confidence every time you cook bacon
Crispiness Checkpoints
Once your bacon has been in the oven for about 12 minutes, it’s time to begin checking for crispiness, especially if you’re cooking regular-cut strips. Cooking times vary, so monitor the bacon closely as it nears the end to avoid overcooking.
If you want extra bacon crispy, place the strips on a metal cooling rack inside the baking sheet; this lets grease drip away and promotes even cooking. While most recipes suggest cooking at 400°F, you can also cook bacon at oven to 350 degrees for a slower, gentler crisp.
After your cooked bacon looks golden and crisp, remove it and let it drain on paper towels. This final step helps the bacon finish crisping as it cools, giving you perfectly crispy results every time.
Remove Bacon and Drain Excess Grease
Carefully pull the baking sheet from the oven with oven mitts to prevent burns, then use tongs to transfer the bacon onto a plate lined with paper towels to soak up the excess grease. This step is essential to remove bacon safely and guarantee it’s not soggy. Let the cooked bacon rest for a few minutes; it’ll crisp up more as it cools.
Don’t forget to drain excess grease by straining it into a heatproof container if you want to save it for future cooking. Dispose of the used paper towels or foil for easier cleanup.
Strain bacon grease into a heatproof container to save for cooking, then toss used paper towels for quick cleanup.
- The smell of freshly cooked bacon fills your kitchen
- The satisfying sizzle as bacon hits the paper towels
- Watching the grease drip away, leaving crispy perfection
- The warmth of bacon grease saved for next recipes
- The anticipation of that first delicious, crunchy bite
Store and Reheat Leftover Bacon Properly
Once your bacon has cooled, make sure to store it in an airtight container in the fridge to keep it fresh for a few days.
If you want to save it longer, freezing individual strips with parchment paper between them works great.
When it’s time to reheat, use a skillet, microwave, or oven to warm it without overcooking.
Proper Storage Techniques
Although bacon tastes best fresh, you can keep leftover strips flavorful by storing them properly. Proper storage is key to preserving that crispy, smoky goodness you love. Always cool your bacon before placing it in an airtight container to store in the fridge, where it stays fresh for up to five days.
If you want to freeze bacon, separate each strip with parchment paper to prevent sticking and freeze for up to three months. Don’t forget to save leftover bacon grease—strain it into a heatproof container and refrigerate for future cooking.
- Use airtight containers to lock in flavor
- Freeze strips individually with parchment paper
- Store bacon grease for added cooking richness
- Keep refrigerated bacon no longer than five days
- Avoid moisture buildup to maintain crispiness
These simple steps guarantee your bacon stays delicious until reheating.
Reheating Methods
Keeping your leftover bacon properly stored is just the first step to enjoying it again. Make sure you keep cooled bacon in an airtight container in the fridge for up to five days to maintain freshness.
When you’re ready to reheat bacon, you have several options. You can warm it in the oven by placing it on a baking sheet at 350°F for about 10 minutes until heated through. Alternatively, use a skillet over low heat to gently reheat bacon without drying it out.
If you prefer the microwave, place bacon between paper towels and heat in short 15-second bursts to avoid overcooking and splattering. These methods help you enjoy crispy, flavorful bacon every time without sacrificing texture or taste.
Freezing Bacon Tips
If you want to extend the life of your leftover bacon, freezing it properly is key. First, make sure your cooked bacon is completely cooled to prevent condensation and freezer burn. Lay the strips flat on a parchment-lined baking sheet so they freeze individually.
This way, they won’t stick together. Once frozen, transfer the bacon into an airtight container or freezer bag, separating layers with parchment for easy access.
- Freeze bacon in single layers on parchment for no sticking
- Store in airtight containers to lock in flavor
- Cool cooked bacon fully before freezing to avoid freezer burn
- Separate layers with parchment paper for easy portioning
- Reheat frozen bacon gently with short microwave bursts or low skillet heat
Following these tips keeps your bacon fresh and delicious for up to three months.
Frequently Asked Questions
What Is the Best Way to Cook Bacon in Your Oven?
The best way to cook bacon in your oven is by preheating it to 400°F and laying the slices in a single layer on a foil-lined baking sheet. You can use an oven-safe rack on the sheet if you want extra crispiness.
Cook regular bacon for about 14 minutes, thick-cut for around 18, checking after 12. Once done, drain on paper towels to remove excess grease.
This method gives you crispy, evenly cooked bacon every time.
Should You Flip Bacon When Baking in the Oven?
Think of your bacon as dancers on a stage—if they’re spaced just right on a metal rack, you don’t need to flip them; the heat twirls evenly around each strip.
But if they’re lying flat on a pan, flipping halfway guarantees every piece gets its moment in the spotlight.
Is It Better to Bake Bacon at 350 or 400 in the Oven?
It really depends on what you want. Baking bacon at 400°F cooks it faster and gives you crispier strips, but you’ll need to watch it closely to avoid burning, especially with thinner slices.
At 350°F, it takes longer but cooks more gently, which is great if you’re making a bigger batch and want evenly cooked bacon.
Is It Better to Bake Bacon in the Oven With Foil or Parchment Paper?
You’ll find foil’s great if you want an easy cleanup since the fat solidifies and you can just crumple it up afterward. Parchment paper, on the other hand, absorbs some grease, which can keep your baking sheet less messy. Both cook bacon evenly, so it really depends on whether you prioritize quick cleanup or less greasy residue.
Either way, just make sure to leave an overhang for easy removal.
Conclusion
Now that you’ve mastered cooking bacon in the oven, you’re set for perfectly crispy slices every time. Did you know Americans consume about 18 pounds of bacon per person annually? That’s a lot of bacon craving satisfaction!
By following these simple steps, you’ll save time, reduce mess, and enjoy consistently delicious bacon. Oven-baked bacon is easy, efficient, and delivers great flavor every time. So go ahead, impress your friends or treat yourself—oven-baked bacon is a game-changer you won’t want to miss.
With this method, you can enjoy perfectly cooked bacon that’s crispy and less greasy. Whether for breakfast, a sandwich, or a salad topping, cooking bacon in the oven is the best way to prepare it. Try these 10 essential steps and elevate your bacon experience today!
