How to Cook Riblets in the Oven at the Right Temp in 10 Easy Steps
To cook riblets perfectly in the oven at the right temp, start by choosing fresh, well-marbled riblets and patting them dry.
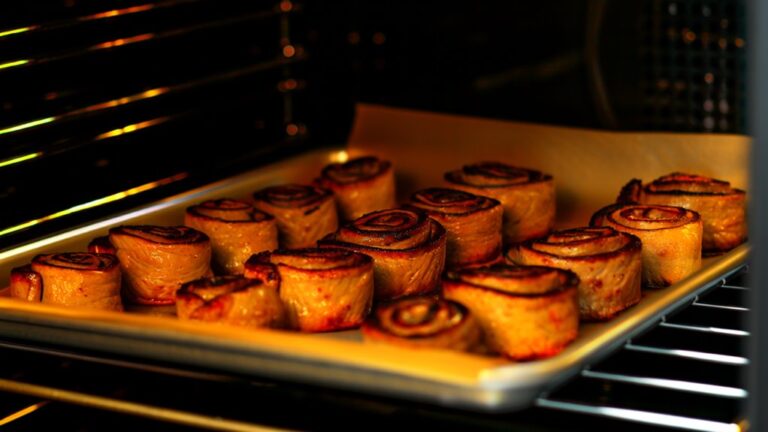
Preheat your oven to 450°F for a 15-minute browning, flipping halfway through. This initial high heat helps seal in the juices and create a delicious crust.
Then, lower the temperature to 350°F. Baste the riblets every 20-30 minutes with BBQ sauce to keep them moist and flavorful. Bake for 90-120 minutes until the riblets are tender and reach an internal temperature of 145°F.
Arrange the riblets in a single layer on your baking tray for even cooking. This ensures each piece cooks uniformly and develops a nice caramelized exterior.
Keep going to discover tips that make your riblets extra juicy and flavorful.
Key Takeaways
- Preheat oven to 450°F (232°C) and arrange riblets in a single layer on a foil-lined pan for initial browning.
- Bake riblets for 15 minutes, flipping halfway to develop a caramelized crust and lock in moisture.
- Pour BBQ sauce over riblets, reduce oven temperature to 350°F (177°C), and bake gently for tenderness.
- Baste riblets every 20-30 minutes to build a sticky glaze and enhance flavor during 90-120 minutes cooking.
- Check doneness with a meat thermometer (145°F/63°C) and fork tenderness, ensuring meat pulls back from bones.
Selecting the Best Riblets for Baking
Choosing the right riblets is key to a delicious baked dish. When picking riblets, you want well-marbled cuts with enough fat to keep them juicy and flavorful as they cook. St. Louis-style riblets are a great choice since they’re larger and meatier, giving you more to enjoy compared to baby back riblets.
It’s best to buy fresh riblets from a trusted butcher or grocery store—look for a bright pink color and avoid any off smells. If you’re buying pre-packaged riblets, check carefully for freezer burn, which can ruin texture and taste. Also, aim for riblets that are evenly cut and uniform in size; this helps them cook evenly and finish perfectly every time.
Preparing Your Oven and Baking Pan

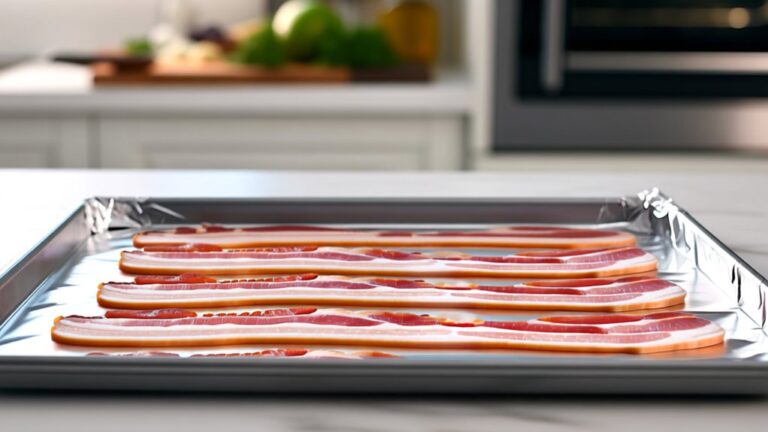
Before you place your riblets in the oven, make certain to preheat it to 450°F (232°C) for a perfect initial browning. Next, prepare your baking pan to guarantee easy cooking and cleanup. Start by lining a 9×13-inch pan with foil to catch drips and prevent sticking.
Then, spray the foil-lined pan lightly with cooking spray. Finally, arrange your riblets in a single layer without overlapping to promote even heat circulation.
To summarize:
- Line your pan with foil for easy cleanup
- Spray the foil with cooking spray to prevent sticking
- Place riblets in a single layer for even cooking
This setup helps your riblets brown nicely before you lower the oven temperature for slow cooking.
Cleaning and Drying the Riblets

Before cooking, you’ll want to rinse the riblets under cold water to wash away any bone fragments and impurities.
Next, pat them dry thoroughly with paper towels to help the seasoning stick and get a better sear.
Taking these simple steps guarantees your riblets cook evenly and taste their best.
Allowing the riblets to dry-brine for 1-2 hours before cooking enhances flavor and browning.
Rinsing Riblets Properly
Start by rinsing your pork riblets under cold water to wash away any bone fragments and surface impurities. Use a colander or a clean sink to guarantee all areas of the riblets are thoroughly cleaned. Once rinsed, it’s vital to remove excess moisture by patting them dry with paper towels.
Properly drying the riblets helps the seasoning stick better and promotes a nice browning during cooking. Remember these key steps when rinsing riblets:
- Rinse under cold water to clean thoroughly
- Use a colander or clean sink for effective rinsing
- Pat dry with paper towels to remove moisture
Removing Bone Fragments
After you’ve thoroughly rinsed and dried your riblets, the next step is to carefully check for any leftover bone fragments. Even after cleaning, small bone shards or splinters can remain stuck to the ribs, so inspect each piece closely. Use a pair of kitchen tweezers to gently remove any bone fragments you find—this guarantees a safer and more enjoyable eating experience.
Also, make certain the ribs are cut into bite-sized pieces, which not only helps with removing hidden fragments but also promotes even cooking. Properly cleaned riblets improve the texture and flavor of your dish by allowing seasoning to stick better and guaranteeing the meat browns nicely in the oven. Taking this extra care makes all the difference in your riblet preparation.
Patting Dry Thoroughly
You’ll often find that thoroughly patting your riblets dry is an essential step for getting that perfect oven-roasted finish. After rinsing to remove any bone fragments, you want to pat dry thoroughly to remove excess moisture. This step is vital because moisture on the surface can prevent better browning and caramelization, leading to less flavorful riblets.
A dry surface also helps seasonings and sauces stick better.
To guarantee ideal results, focus on:
- Using clean paper towels to absorb moisture effectively
- Covering all sides of the riblets evenly
- Avoiding rinsing again after drying to maintain dryness
Arranging Riblets for Even Cooking
To get your riblets cooked evenly, arrange them in a single layer on the baking sheet without overlapping. This helps each piece brown properly and cook through at the same rate.
Make sure there’s enough space between them so heat can circulate freely.
Single Layer Arrangement
Placing your riblets in a single layer on the baking sheet is key to cooking them evenly and getting that perfect crispy finish. This single layer arrangement guarantees proper heat circulation around each piece, promoting even cooking throughout. When you space out the riblets correctly, air flows freely, helping the exterior crisp up nicely without any soggy spots.
To nail this:
- Use a parchment-lined or foil-covered baking sheet for easy cleanup and to prevent sticking.
- Position riblets bone-side down so the meat renders fat and boosts flavor.
- Leave adequate space between each riblet to allow heat to circulate evenly.
Avoid Overlapping Pieces
Keeping riblets in a single layer is important, but it’s equally important to avoid overlapping them. When you arrange riblets on your baking sheet, make certain there’s enough space between each piece to allow hot air to circulate evenly. Overlapping pieces trap moisture and heat inconsistently, causing some riblets to be undercooked while others dry out.
To get the best results when you oven to bake riblets, spread them out so each piece can brown and caramelize properly. If you have too many riblets to fit in one layer, cook them in batches instead of crowding the pan. For even better airflow, try using a wire rack over your baking sheet to keep riblets separated and guarantee consistent cooking.
Initial High-Heat Browning Step
Although it’s tempting to skip ahead, you’ll want to preheat your oven to 450°F (232°C) for the initial high-heat browning step. This temperature is key for achieving that delicious caramelized crust on your riblets. Start by arranging the riblets in a single layer on a lined baking sheet to guarantee even browning.
Bake them for about 15 minutes, flipping halfway through so both sides get that perfect golden color. This step locks in moisture and sets the stage for tender, flavorful riblets.
To summarize the process:
- Preheat oven to 450°F (232°C) for effective browning
- Lay riblets out evenly, avoiding overlap
- Bake 15 minutes, flipping halfway for balanced browning
This initial oven step is essential for mouthwatering riblets.
Crafting a Homemade Barbecue Sauce
Once your riblets have that perfect golden crust, it’s time to complement them with a homemade barbecue sauce that packs a flavorful punch.
Start by combining brown sugar, Worcestershire sauce, and white vinegar in a saucepan. Add spices like paprika, dry mustard, and chili powder for depth.
Simmer the mixture, stirring occasionally, until the sauce thickens. Adjust consistency with extra vinegar or water if needed. Feel free to personalize your homemade BBQ sauce with garlic, onion powder, or hot sauce to suit your taste buds.
| Ingredient | Quantity | Purpose |
|---|---|---|
| Brown sugar | 1 cup | Sweetness |
| Worcestershire sauce | 1/4 cup | Umami and tang |
| White vinegar | Splash | Balances sweetness |
| Paprika | 1 tbsp | Adds smoky flavor |
| Dry mustard & chili powder | 1 tsp & 1/4 tsp | Spices for depth |
Applying Sauce and Lowering Oven Temperature
Once your riblets have browned at 450°F, lower the oven to 350°F to keep them tender while cooking through. Coat them thoroughly with your homemade sauce to lock in flavor and moisture.
Remember to baste every 20-30 minutes to build a rich, sticky glaze as they bake.
Sauce Application Tips
Since you want tender, flavorful riblets, it’s important to apply your sauce thoughtfully and adjust your oven temperature accordingly. After browning the riblets at 450°F, reduce the heat to 350°F to keep the meat juicy while the sauce thickens. Use thick homemade sauce ingredients or thicken store-bought sauce on the stove for better adhesion.
Pour the sauce over riblets before baking, then baste every 20-30 minutes to build a sticky glaze. Coat each riblet thoroughly with sauce for maximum flavor. Baste every 20-30 minutes to enhance moisture and develop a rich crust.
Lower oven temperature after initial high heat to prevent drying out. These steps guarantee your riblets are both tender and bursting with saucy goodness.
Optimal Oven Temperature
To get perfectly cooked riblets, start by preheating your oven to 450°F (232°C) to brown the meat and lock in flavor. This high heat guarantees the ideal temperature for developing a delicious crust. After about 15 minutes, pour your BBQ sauce over the riblets, coating them thoroughly.
Then, reduce the oven temperature to 350°F (177°C) to continue cooking slowly and evenly. This lower heat helps the riblets become tender pork ribs, allowing the flavors to meld and the meat to soften without drying out. To make sure they’re safe and juicy, cook until the internal temperature reaches at least 145°F (63°C).
This method balances initial searing with gentle cooking, giving you riblets that are flavorful, tender, and perfectly sauced.
Timing Sauce and Heat
After browning your riblets at high heat, you’ll want to pour on the BBQ sauce and immediately lower the oven temperature to 350°F. This timing guarantees your riblets cook evenly while the sauce thickens and caramelizes perfectly. Applying the sauce right after browning locks in flavor and moisture.
Keep these tips in mind for ideal timing, sauce, and heat:
- Pour the homemade BBQ sauce over riblets for full coverage.
- Bake at 350°F for 90–120 minutes to achieve fork-tender meat.
- Baste every 20–30 minutes to maintain moisture and enhance flavor.
Baking Time and Basting Techniques
When you bake riblets at 350°F, you’ll guarantee they cook evenly and develop a delicious crust. The total baking time usually ranges from 90 to 120 minutes depending on their size. To keep them moist and flavorful, it’s essential to baste them with sauce every 20-30 minutes.
Using a thick homemade BBQ sauce works best because it clings well, enhancing the flavor and texture.
| Baking Time | Basting Interval |
|---|---|
| 90 minutes | Every 20 minutes |
| 120 minutes | Every 30 minutes |
| Adjust as needed | Use thick sauce |
Following these baking time and basting techniques guarantees your riblets stay juicy and richly coated in sauce throughout cooking.
Checking for Tenderness and Doneness
Basting your riblets regularly helps keep them juicy, but you’ll still want to make certain they’re cooked through and tender before serving. To check for tenderness and doneness, use a meat thermometer to ascertain the internal temperature reaches at least 145°F (63°C).
Then, look for visual and texture cues indicating your ribs are perfectly cooked. The meat should pull back from the bones slightly. Juices running clear signal the riblets are done.
Fork tenderness means the meat easily pulls away, confirming ideal tenderness. If your riblets aren’t fork-tender yet, keep baking and check every 15 minutes. This way, you’ll serve ribs that are both safe and deliciously tender.
Serving Suggestions and Storage Tips
A well-plated meal can elevate your riblets, so consider serving them with creamy mashed potatoes or steamed rice to balance their rich flavor. For a classic Southern touch, pair your ribs with cornbread. If you want a revitalizing contrast, coleslaw or a light salad works perfectly.
Once your ribs are cooked, proper storage is key. Use airtight containers to store leftovers in the refrigerator for up to four days to keep them fresh. If you plan to freeze them, wrap your riblets tightly, and they’ll stay good for up to five months.
These serving suggestions and storage tips guarantee you enjoy your riblets at their best, whether fresh or reheated later.
Frequently Asked Questions
What Temperature to Cook Riblets in the Oven?
You should cook riblets at two main temperatures: start by preheating your oven to 450°F to brown them, then lower it to 350°F for the rest of the cooking time. This combo helps get a nice crust while keeping them tender.
Alternatively, you can cook them at 325°F uncovered, then wrap them to finish. Just remember to check they reach 145°F inside before serving for safety.
How Long Should You Cook Ribs in the Oven for Them to Be Tender?
You should cook ribs in the oven for about 90 to 120 minutes to get them tender. Make certain to check every 20-30 minutes and baste them to keep them juicy and flavorful.
When the meat starts pulling away from the bones and the juices run clear, they’re done. Don’t forget to let them rest after cooking to lock in the moisture and guarantee they’re perfectly tender and safe to eat.
What Is the Best Way to Cook Beef Riblets?
Just like a master sculptor chisels away patiently, you’ll want to slow-cook your beef riblets at 300°F to release their tenderness. Season them well with a dry rub, then roast uncovered for an hour to build a flavorful crust.
Wrap them in foil afterward to keep moisture in, cooking for 2-3 hours until tender. Finish by basting with BBQ sauce for that irresistible glaze. It’s patience and care that make them perfect.
How Long Does It Take to Cook Boneless Pork Ribs at 350 in the Oven?
It takes about 90 to 120 minutes to cook boneless pork ribs at 350°F in the oven. You’ll want to baste them every 20 to 30 minutes to keep them juicy and flavorful. Check for tenderness by seeing if the meat pulls away easily from the bone.
If your riblets are thicker, add an extra 15 minutes. Always make sure they reach an internal temperature of 145°F for safe eating.
Conclusion
Now that you’ve mastered the art of cooking riblets in the oven, you’re ready to serve up a feast that’s tender and full of flavor. Just like a painter adding the final brushstroke, your careful basting and perfect timing bring these riblets to life.
Remember, patience is key—treat them right, and they’ll reward you with juicy bites every time. Cooking riblets in the oven at the right temp ensures they turn out perfectly every time. Enjoy your delicious creation and don’t forget to store leftovers properly for later enjoyment!