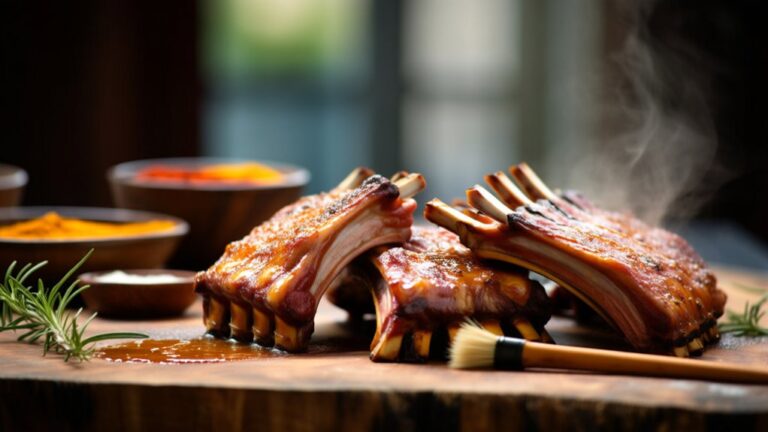
How to Reheat Ribs in the Oven in 9 Easy Steps
To reheat ribs in the oven, first thaw them completely and preheat your oven to 350°F. This method ensures your ribs stay juicy and tender while warming through evenly.
Wrapping the ribs tightly in foil helps retain moisture during reheating.
Place the foil-wrapped ribs on a baking sheet and heat them slowly for about 30 minutes, flipping halfway through. Be sure to check the internal temperature to reach 165°F for safe consumption.
Once heated, unwrap the ribs and return them to the oven for a few minutes to crisp the edges.
Let the ribs rest before serving to allow the juices to redistribute.
Keep going to discover tips for caramelizing sauce and perfect presentation!
Key Takeaways
- Thaw ribs completely in the fridge for 24 hours if frozen and cut into manageable sections for even reheating.
- Preheat the oven to 350°F, confirming the temperature with an oven thermometer before placing the ribs inside.
- Wrap ribs securely in foil with a light cooking spray inside to retain moisture and prevent sticking.
- Heat ribs wrapped for 15 minutes per side, then unwrap and heat an additional 5 minutes, checking for 165°F internal temperature.
- Let ribs rest 5–10 minutes, brush with barbecue sauce, and return to the oven for 5 minutes to caramelize the sauce.
Prepare Your Ribs for Reheating

Before you reheat your ribs, start by removing them from their vacuum-sealed packaging and placing them in the fridge for at least 24 hours if they’re frozen. This gradual defrosting helps maintain the ribs’ texture and guarantees even heating.
Next, wrap the ribs securely in aluminum foil to lock in moisture and prevent drying out during reheating. Lightly spray the inside of the foil with cooking spray to stop the meat from sticking. Make sure the foil is tightly sealed with no openings, creating a steamy environment that keeps your ribs juicy.
Place the wrapped ribs on a rimmed cookie sheet to catch any drips. When reheating, use a thermometer to check the internal temperature, aiming for a safe and hot 165°F before serving.
Preheat Your Oven to the Correct Temperature

You’ll want to preheat your oven to 350°F, which is perfect for reheating ribs without drying them out. Make sure to give your oven enough time to reach this temperature before putting the ribs in.
This step helps keep your ribs juicy and evenly heated every time.
Ideal Oven Temperature
Setting your oven to 350°F is the best way to reheat ribs evenly while preserving their flavor. This temperature guarantees the ribs warm through without drying out or overcooking. To get accurate results, use an oven thermometer to confirm your oven’s true temperature.
Avoid placing ribs inside before the oven fully reaches 350°F, as this can cause uneven heating. If you want extra moist ribs, consider lowering the temperature to 250°F and reheating for a longer time, but 350°F remains ideal for balanced results. Always check that the ribs reach an internal temperature of at least 165°F for safety.
- Oven thermometer showing 350°F
- Ribs wrapped in foil on a baking tray
- Warm, juicy ribs with slight caramelized edges
- Oven door closing as heat stabilizes
Proper Preheating Time
To get your ribs reheated just right, give your oven at least 15 minutes to reach 350°F before putting the ribs inside. This guarantees even heating and helps the ribs retain their flavor. Preheating creates a stable cooking environment, preventing temperature fluctuations that can affect reheating quality.
Using an oven thermometer is a smart move to check if your oven hits the right temperature. Remember, reaching 350°F is key to heating ribs safely to an internal temperature of 165°F.
| Step | Action | Purpose |
|---|---|---|
| 1 | Set oven to 350°F | Desired reheating temperature |
| 2 | Wait 15 minutes | Oven reaches stable heat level |
| 3 | Use oven thermometer | Verify temperature accuracy |
| 4 | Place ribs inside | Begin reheating process |
| 5 | Monitor internal temperature | Confirm safe consumption |
Wrap the Ribs Securely in Foil

Although it might seem simple, wrapping the ribs securely in foil is key to keeping them moist and flavorful during reheating. First, make sure your ribs are completely thawed to help retain moisture. Lightly spray the inside of the foil with cooking spray to prevent sticking.
Wrapping thawed ribs tightly in sprayed foil locks in moisture and flavor while preventing sticking during reheating.
Wrap the ribs tightly, sealing any openings to trap steam and heat evenly. If your ribs are large, cut them into smaller sections for easier handling and uniform reheating.
Here’s what to keep in mind:
- Thawed ribs wrapped tightly in foil
- Cooking spray inside foil to prevent sticking
- Double-check for any foil openings
- Cut large rib sections for even reheating
This method preserves the ribs’ texture and flavor perfectly.
Place Wrapped Ribs on a Baking Sheet
One important step after wrapping your ribs in foil is placing them on a rimmed baking sheet. This sheet not only catches any juices that might escape during reheating but also prevents spills inside your oven. Make certain the baking sheet is large enough so the ribs aren’t crowded, allowing the heat to distribute evenly.
The rimmed edges are essential—they keep drippings contained, avoiding mess. Plus, using a baking sheet adds stability, making it easier and safer to transfer the ribs in and out of the oven. As you handle them, keep an eye to ensure the baking sheet remains level to prevent any spills.
Taking these precautions will help keep your kitchen clean and your ribs perfectly reheated.
Heat the Ribs Slowly in the Oven
When you heat the ribs slowly in the oven, you help preserve their tenderness and prevent them from drying out. Start by preheating your oven to 350°F, creating a steady environment for even reheating. Wrap the ribs tightly in aluminum foil, lightly sprayed with cooking spray to keep them from sticking.
Place the wrapped ribs on a baking sheet and heat them for 15 minutes. Then, flip the foil package and heat for another 15 minutes to guarantee warmth penetrates evenly. Finally, unwrap the ribs and return them to the oven for 5 more minutes to finish heating.
Picture this:
- Warm steam escaping as you unwrap the foil
- Juices glistening on tender meat
- Aromatic smoke wafting through the kitchen
- Ribs sizzling gently on the hot baking sheet
Check the Internal Temperature of the Ribs
After gently heating your ribs in the oven, the next step is to check their internal temperature to confirm they’re safe to eat. Use a meat thermometer and insert it into the thickest part of the meat, avoiding contact with the bone for an accurate reading. You want to make sure the ribs reach at least 165°F.
Since ribs can vary in thickness and heat unevenly, keep a close eye on the temperature. If they haven’t hit 165°F yet, pop them back into the oven and check every 5 minutes. Consistently monitoring the internal temperature not only assures safety but also helps preserve the ribs’ juicy texture and flavor, making your reheated ribs just as delicious as when they were first cooked.
Unwrap and Crisp the Ribs in the Oven
Once the ribs have warmed through, you’ll want to unwrap them from the foil to let the exterior crisp up. Increase your oven temperature to 375°F to encourage caramelization on the surface. Place the unwrapped ribs back in the oven for another 5 to 10 minutes, keeping a close eye on them to avoid drying out or burning.
Make sure the internal temperature stays at least 165°F for safety and flavor. Visualize:
- Glazed edges bubbling and darkening
- Slightly charred crust forming
- Juices sizzling as they crisp
- Aromatic spices intensifying
This step gives your ribs that perfect texture and finish, making them taste freshly grilled even after reheating.
Rest the Ribs Before Serving
Although the ribs are piping hot right out of the oven, you’ll want to let them rest for 5 to 10 minutes to let the juices redistribute and keep the meat moist and flavorful. Cover them loosely with foil during this time to retain warmth without causing steam that could soften the exterior. Resting not only enhances flavor and moisture but also improves texture by preventing dryness when you cut into the meat.
Additionally, the internal temperature may rise slightly during this period, helping guarantee the ribs reach a safe 165°F. Taking this short pause before serving makes the meat easier to slice and allows flavors to meld, resulting in a tastier, more satisfying eating experience. Don’t skip this vital step for perfectly reheated ribs.
Serve and Enjoy Your Perfectly Reheated Ribs
Once your ribs have rested and reached the right temperature, it’s time to cut them between the bones for easy serving. Don’t forget to flip the slab so the bones face up—this makes for a great presentation.
Finally, add a side of barbecue sauce to bring out all those smoky, rich flavors before you dig in.
Resting Before Serving
While the ribs are resting, take about 5 to 10 minutes to let the juices redistribute, ensuring each bite stays moist and flavorful. This resting period prevents the juices from spilling out when you cut the ribs, keeping the texture just right. Place the ribs bone side up on a cutting board to keep things tidy and maintain their structure.
This simple step makes all the difference in your eating experience. Imagine:
- Warm ribs resting gently, juices settling inside
- Bones neatly facing upward, ready for slicing
- A cutting board catching any stray drips
- A subtle sheen of sauce waiting to be added or served on the side
Taking this time guarantees ribs that are juicy and delicious every time.
Cutting Between Bones
After letting the ribs rest and the juices settle, you’re ready to cut between the bones for serving. Place the ribs on a cutting board with the bone side facing up; this makes slicing easier and neater. Grab a sharp chef’s knife and carefully cut between each bone, ensuring clean cuts that keep the meat intact.
This method helps you create even portions and presents the ribs nicely. Once all the ribs are cut, flip the slab over to showcase the meaty, appealing side. Now your perfectly reheated ribs are ready to serve.
Enjoy the satisfying result of your effort, perfectly portioned and visually inviting, making your meal all the more enjoyable.
Adding Barbecue Sauce
To bring your reheated ribs to the next level, brush a generous layer of barbecue sauce on both sides as soon as you unwrap them. This adds moisture and rich flavor.
For an extra touch, pop the sauced ribs back into the oven at 350°F for 5 minutes to let the sauce caramelize slightly. Make sure the ribs reach an internal temperature of 165°F for safety.
Use a quality barbecue sauce that complements the original taste, and don’t forget to serve extra sauce on the side for dipping.
- Sticky, glossy coating glistening under warm light
- Sweet and smoky aroma filling the kitchen
- Slightly charred edges from caramelized sauce
- Juicy, tender meat ready to be savored
Frequently Asked Questions
How to Warm up Already Cooked Ribs in the Oven?
You’ll want to preheat your oven to 350°F. Wrap your ribs tightly in foil, spraying the inside with a bit of cooking spray to keep them moist and prevent sticking.
Place the wrapped ribs on a baking sheet and heat for about 15 minutes, then flip and heat another 15 minutes.
Use a meat thermometer to verify they reach 165°F before serving, adding more time if needed to warm them through evenly.
What’s the Best Way to Reheat Ribs Without Drying Them Out?
The best way to reheat ribs without drying them out is to wrap them tightly in aluminum foil with a bit of broth or sauce to keep moisture in. Then, set your oven to a low temperature, around 250°F, and heat the ribs slowly for 20–45 minutes. Use a meat thermometer to check they reach 165°F inside.
This gentle method keeps the ribs juicy and tender, avoiding toughness from high heat.
How Long to Heat Ribs at 350 Degrees?
You’ll want to heat ribs at 350°F for about 30 minutes—because who doesn’t enjoy a slow, suspenseful journey to perfectly warm ribs? Flip them halfway through, around 15 minutes, to keep things evenly cooked.
Don’t just guess; use a meat thermometer to make sure they hit 165°F—because playing chicken with food safety isn’t a winning game. Wrap them in foil, and you’ll thank yourself for moist, flavorful ribs!
Do I Need to Wrap Ribs in Foil to Reheat?
Yes, you should wrap ribs in foil when reheating them. Wrapping helps trap moisture, keeping the ribs juicy and tender instead of drying out. It also protects the meat from direct heat, preventing it from toughening.
Adding a bit of sauce or broth inside the foil can boost flavor and moisture even more. So, to get the best results, don’t skip the foil wrap when reheating your ribs.
Conclusion
Reheating ribs in the oven is simple and keeps them juicy and flavorful. Did you know that cooking ribs low and slow at around 250°F helps retain moisture, making your leftovers taste almost as good as fresh? By following these easy steps, you’ll enjoy tender, warm ribs every time without drying them out.
So next time you’ve got leftover ribs, just pop them in the oven and savor that delicious, smoky goodness all over again! Remember, reheating ribs in the oven is the best way to maintain their tenderness and flavor. With these tips, your oven-reheated ribs will be as mouthwatering as when they were first cooked.