
10 Easy Steps to Make Sliders in the Oven
To make sliders in the oven, first gather your ingredients including ground beef, cheese, and soft buns. This simple oven-baked slider recipe ensures juicy, cheesy sliders that everyone will love.
Preheat your oven to 350°F to get started.
Mix the ground meat with seasonings, then press it evenly into a baking pan. Bake for 20 minutes, drain excess juices, and add cheese on top. Bake again until the cheese melts and bubbles perfectly.
Slice the meat into portions, then assemble the sliders on the soft buns. Follow these easy steps for delicious oven-baked sliders.
Find out how to elevate your slider game even further with simple tips and tricks.
Key Takeaways
- Preheat the oven to 350°F and prepare a 9×13-inch pan for even cooking of the slider meat base.
- Season 2 lbs of ground beef with garlic powder, salt, and pepper, then press into the pan for baking.
- Bake the meat mixture for 20 minutes, drain excess juices, then add cheese and bake for an additional 5-10 minutes.
- Slice the baked meat into 2-inch squares and place on soft slider buns like Hawaiian rolls.
- Assemble sliders by adding melted butter on buns, topping with meat and cheese, then bake briefly for optimal melting.
Gather Your Ingredients
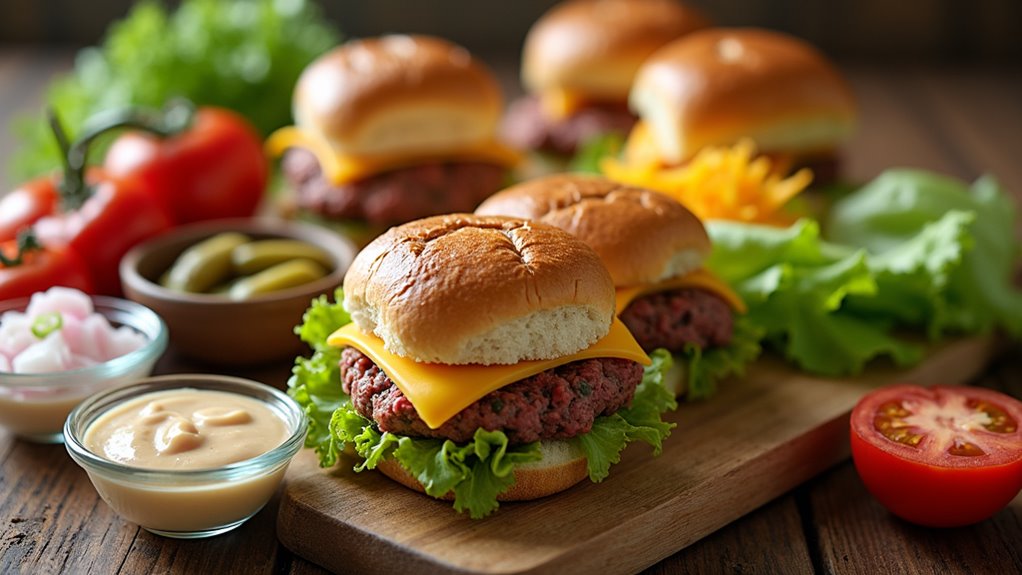
Before you start making sliders in the oven, make sure you’ve gathered all the essentials. First, gather your ingredients starting with 2 lbs of lean ground beef, ideally 85% lean for the perfect balance of flavor and juiciness. Next, pick out soft Hawaiian rolls; their size and texture make them ideal slider buns that hold the patty nicely.
Don’t forget to choose your favorite cheese—sliced or shredded works great and melts beautifully over the beef. Alongside these basics, consider any seasonings like salt and pepper to enhance flavor. You might also want toppings like lettuce, tomatoes, or pickles.
Finally, have olive oil or butter ready to cook the patties and add a nice glaze to the buns. Once everything’s prepped, you’re ready for the next step.
Preheat the Oven
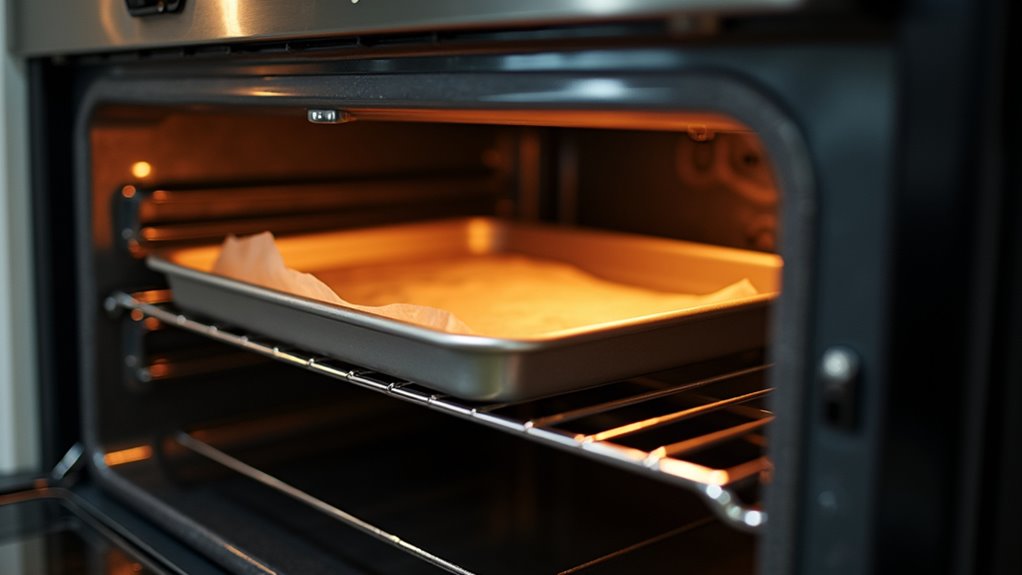
With all your ingredients ready, the next step is to preheat your oven to 350°F. Preheating the oven is vital for even cooking and ideal browning of your sliders. It guarantees the cheese melts perfectly and the buns get toasted just right.
To achieve accurate temperature, give your oven at least 10-15 minutes to reach 350°F before putting your sliders inside. Using an oven thermometer can help you verify the temperature since some ovens run hotter or cooler than the dial indicates. Also, make sure the oven rack is positioned in the middle to promote even heat distribution.
Taking these steps will assure your sliders bake evenly with that perfect golden finish you’re aiming for.
Prepare the Ground Meat Mixture

Grab 2 pounds of 85% lean ground beef and place it in a mixing bowl. To prepare a flavorful meat mixture, add your seasoning carefully. Here’s what you’ll do:
- Sprinkle 2 teaspoons of garlic powder
- Add 1 teaspoon of kosher salt
- Mix in 2 teaspoons of ground black pepper
Optionally, fold in diced onions or other spices. Gently combine ingredients without overworking the ground meat. This method guarantees your sliders stay tender.
Once mixed, the meat mixture will be ready to transfer into your baking dish. Avoid compacting too much here, as that can make the sliders tough. With these simple steps, your ground meat is perfectly seasoned and prepared for the next stage.
Press Meat Evenly Into Baking Pan
Press the seasoned ground beef evenly into a 9×13-inch baking pan to guarantee consistent cooking. Lining the baking pan with parchment paper or foil first will make it easier to remove the cooked meat later. When you press meat evenly, aim for about a 1-inch thickness to assure uniform cooking throughout.
Use your hands or a spatula to gently spread the ground meat without compacting it too much, as this helps keep the texture light. Make certain to smooth out the surface and eliminate any air pockets that could cause uneven cooking. Taking these steps will give you a perfectly even meat base, setting the foundation for delicious sliders every time.
Bake the Meat Base
Preheat your oven to 350°F to guarantee the meat cooks evenly. Once you’ve pressed your seasoned ground beef into the baking dish, it’s time to bake the meat base. Here’s what you should do:
- Place the dish in the preheated oven.
- Bake for 20 minutes to allow the ground beef to cook through evenly.
- This step assures your baked sliders have a solid, juicy foundation.
- After baking, you’ll be ready to layer cheese so the cheese melts perfectly over the warm meat. Baking at this temperature helps lock in flavor and moisture without drying out the meat.
Following these steps will give you a delicious, well-cooked base for your sliders, making the next steps easier and tastier.
Drain Excess Juices
Once your meat is baked, you’ll want to drain the excess juices to keep your sliders from getting soggy. Using a spoon or turkey baster, carefully remove the liquid that collects in the baking dish.
This step sharpens the flavor and guarantees your buns stay perfectly textured.
Importance of Draining
Although it might seem like a small step, draining excess juices from your baked sliders is vital to keep the buns from getting soggy and to preserve their texture. When cooking ground beef, a lot of grease can be released, which, if left unchecked, can ruin your sliders’ appeal.
By draining excess juices, you prevent sogginess in the buns, improve texture and firmness, and concentrate the beef’s rich flavor. You also avoid waterlogged, greasy sliders, making them more enjoyable and flavorful.
This step is especially important with fattier ground beef cuts, which produce more grease. Draining helps maintain the slider’s integrity and guarantees each bite is deliciously satisfying without excess fat diluting the taste. Don’t skip this key step—it’s vital for perfect oven-baked sliders.
Methods to Remove Juices
Start by carefully tilting your baking pan to drain excess juices without losing any meat. This simple step helps keep your sliders from becoming soggy. If you spot visible grease on the meat’s surface, use a spoon or ladle to scoop it off before adding cheese.
For larger amounts of liquid, a turkey baster makes it easier to drain juices efficiently. Make sure to drain the excess juices immediately after baking to maintain the sliders’ flavor and prevent them from getting watery. Once drained, let the meat rest a few minutes so it can retain its natural juices, ensuring your sliders stay juicy but not overly wet.
These methods help you control moisture and deliver perfectly cooked sliders every time.
Impact on Slider Texture
If you want your sliders to have the perfect texture, draining the excess juices from the cooked beef is crucial. When you cook ground beef, excess liquid can make the buns soggy and the texture less enjoyable. By draining excess juices, you guarantee a firmer, more satisfying slider that holds up well on buns.
Here’s how draining affects your sliders:
- Prevents sogginess in the slider texture
- Keeps buns from becoming overly wet
- Concentrates the beef’s flavor for better taste
- Works best when done after 30 minutes of baking
- Using lean ground beef reduces excess juices
Draining excess juices improves both texture and flavor, making your sliders delicious and easy to handle.
Add Cheese Topping
When you add cheese to your sliders, choosing varieties like cheddar or Swiss that melt well will give you that perfect gooey texture. Since sliders are the easiest to prepare with ground meat, adding cheese on top just before the final baking stage enhances flavor without complicating the process.
For oven baked sliders, place the cheese on top during the last 5-10 minutes of cooking so it melts evenly and doesn’t overcook. You can use slices or shredded cheese, distributing it evenly across all sliders for consistent taste. This simple step elevates your sliders nicely, making each bite gooey and delicious.
Bake Until Cheese Melts
You’ll want to bake your sliders at 350°F to get the cheese perfectly melted without burning it. Adding the cheese during the last 5 to 10 minutes helps achieve that ideal gooey texture. Keep a close eye on them so you can pull them out just as the cheese starts to bubble and turn golden.
Perfect Cheese Melting
Though it may seem simple, achieving perfectly melted cheese on your sliders requires a bit of timing and technique. For perfect cheese melting, add the cheese during the last 5-10 minutes of baking to avoid overcooking the meat. Use cheese that melts well like American, Swiss, or cheddar for gooey, flavorful results.
Here are some tips to get it right:
- Add shredded cheese for faster, more even melting compared to slices
- Cover the baking dish with foil initially to trap steam and prevent drying
- Watch closely; cheese should be bubbly and slightly browned, not burnt
- Place cheese on top of the meat after the main baking phase
- Use a quality baking dish that distributes heat evenly
Following these steps guarantees your sliders come out with perfectly melted, delicious cheese every time.
Oven Temperature Tips
If you want your sliders to have perfectly melted cheese without drying out the meat, preheating the oven to 350°F is key. This temperature guarantees the cheese melts evenly while the meat reaches a safe internal temperature of 160°F. Try covering with foil for the first half of baking to keep moisture in, then remove it so cheese browns nicely.
Adding cheese during the last 5-10 minutes prevents overcooking.
| Step | Temperature | Tip |
|---|---|---|
| Preheat oven | 350°F | Ideal for even baking |
| Cover with foil | First half baking | Retains moisture |
| Add cheese | Last 5-10 mins | Melts cheese without drying meat |
| Remove foil | Second half | Brown cheese on top |
| Check internal temp | 160°F | Guarantees meat safety |
Timing for Gooeyness
When baking sliders at 350°F, timing is essential to achieve perfectly melted, gooey cheese without overcooking the meat. Start by baking the sliders for 20 minutes to cook the beef thoroughly. Then, add the cheese for the last 5-10 minutes to reach ideal gooeyness.
Keep a close eye on the cheese during this final stage—it should be melted and slightly bubbling. Remember, shredded cheese melts faster than sliced, so adjust your timing accordingly. Once out of the oven, let your sliders rest briefly to let the cheese set just right.
- Bake sliders 20 minutes before adding cheese
- Add cheese during last 5-10 minutes of baking
- Monitor for melted, bubbling cheese
- Adjust time for shredded vs. sliced cheese
- Rest sliders a few minutes before serving
Slice Into Slider Portions
Let your baked meat cool slightly so it’s easier to handle, then grab a sharp knife or pizza cutter to slice it into roughly 2-inch squares. If you’ve mixed in sliced cheese with your ground turkey before baking, you’ll notice it’s melted perfectly, sticking to each portion for extra flavor. Cutting evenly guarantees your slider portions hold together well, making them easier to place on rolls in half.
This step is essential for keeping each slider intact and ready for assembly. By slicing carefully, you set the stage for delicious recipes that showcase perfectly sized, gooey sliders. Remember, neat slicing into uniform pieces helps maintain the presentation and makes serving a breeze for your guests.
Assemble Sliders With Buns and Toppings
Choose soft slider-sized buns, like Hawaiian rolls, to complement your savory meat. Start by slicing the Hawaiian rolls in half and laying the bottom half on a baking sheet.
Next, evenly spread your cooked beef mixture over the bottom halves, then add cheese so it melts perfectly during baking. Customize your sliders with fresh toppings before placing the top half of the buns on.
Finally, brush the assembled sliders with melted butter for extra flavor and moisture.
- Slice Hawaiian rolls in half
- Layer cooked beef on bottom half
- Add cheese for melting
- Top with fresh toppings
- Cover with top half and brush with melted butter
This method guarantees your sliders bake evenly, bursting with flavor and a golden finish.
Frequently Asked Questions
How to Bake Sliders in the Oven?
To bake sliders in the oven, preheat it to 350°F. Cook your seasoned ground beef until fully done, then layer it between sliced rolls with cheese.
Place them in a baking dish, brush melted butter on top for extra flavor, and bake until the rolls turn golden brown. Once baked, cut into portions and serve while warm, letting everyone add their favorite toppings.
You’ll have delicious, crowd-pleasing sliders ready in no time!
How Long Should Sliders Be in the Oven at 350 Degrees?
You should bake sliders at 350°F for about 20 minutes if they’re assembled with raw ground beef. If you’re using pre-cooked beef, 10 to 15 minutes is enough to heat them through. Just make sure the internal temperature hits 160°F for safety.
Adding a glaze on top during the last 20 minutes can really boost flavor, so don’t skip that step if you want extra tasty sliders!
What’s the Secret to a Juicy Slider?
The secret to a juicy slider is using ground beef with about 15% fat to keep it moist without shrinking too much. Don’t pack the meat tightly; this helps air circulate and retains moisture. Mixing in diced onions or a bit of olive oil adds flavor and juiciness.
Bake at 350°F for even cooking, then let your sliders rest a few minutes so the juices settle, giving you a tender, flavorful bite every time.
What to Put on Sliders in the Oven?
You should put a savory butter mixture on your sliders before baking—melted butter mixed with Dijon mustard, Worcestershire sauce, and onion powder works great.
Layer your favorite cheese, like Swiss or cheddar, over the meat for gooey goodness. After baking, add fresh toppings like pickles, lettuce, tomatoes, and ketchup to customize each slider.
Don’t forget to sprinkle sesame or poppy seeds on top for a nice crunch and extra flavor.
Conclusion
Now that you’ve mastered these simple steps, you’re just moments away from sinking your teeth into perfectly baked sliders. Imagine that first bite—the melty cheese, juicy meat, and all your favorite toppings coming together. But don’t rush!
Let the sliders rest just a bit to lock in all that flavor. When you finally assemble them, get ready for a taste that’s worth every second of anticipation. Your oven-made sliders are about to steal the show!
By following these easy steps, you’ve created delicious sliders that are sure to impress. Enjoy your homemade oven-baked sliders with family and friends. These tasty treats are perfect for any occasion!
