How to Make Garlic Bread in Oven in 10 Easy Steps
To make garlic bread in the oven, start by gathering your bread, butter, garlic, and parsley.
Preheat the oven to 400-425°F to ensure even cooking and a crispy crust. Slice the bread lengthwise to prepare it for the garlic butter spread.
Next, mix softened butter with minced garlic and parsley for that classic garlic bread flavor. Spread this garlic butter generously over the bread to cover every bite.
Place the bread on a lined baking sheet to prevent sticking and easy cleanup.
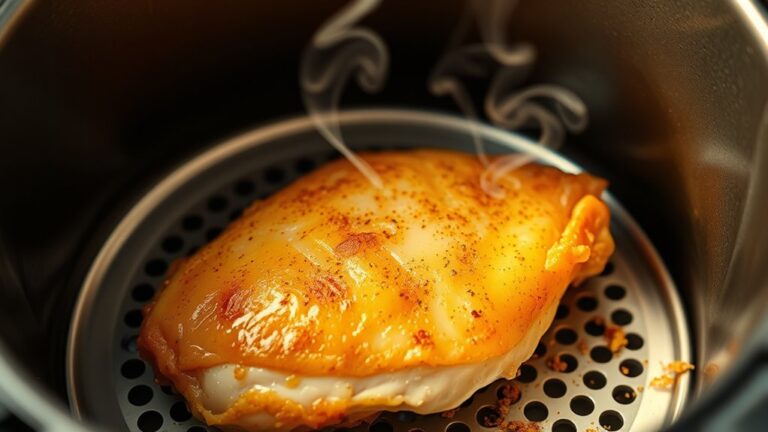
Bake for 10-15 minutes until the bread turns golden and fragrant. If you like, add cheese near the end of baking for a melty, delicious topping.
Let the garlic bread cool slightly, then slice and serve warm for the best taste.
Keep going to discover tips for perfect garlic bread results every time!
Key Takeaways
- Preheat oven to 400-425°F and line a baking sheet with parchment paper or foil.
- Slice a loaf of French or Italian bread lengthwise for even garlic butter spreading.
- Mix softened butter with minced garlic, chopped parsley, and optional Parmesan cheese.
- Spread garlic butter generously on bread cut sides, then bake for 10-15 minutes until golden.
- Optionally sprinkle cheese last 2 minutes, slice warm, and store leftovers properly.
Gather Your Ingredients

To make delicious garlic bread, you’ll need a 1-pound loaf of French or Italian bread for thick, flavorful slices. First, gather your ingredients carefully to guarantee every bite is perfect. You’ll want ½ cup of softened unsalted butter, which creates a rich, creamy base for the garlic spread.
Fresh garlic is essential—mince about 4 cloves finely to infuse the bread with authentic, robust flavor. If you’re using Italian bread, it adds a wonderful texture and taste that holds up well to the butter and garlic mixture. For a fresh touch, consider adding 1 tablespoon of finely chopped parsley.
Optional cheese like parmesan or mozzarella can be included for extra indulgence, but the basics are all you really need to start.
Preheat the Oven

Before you start baking, preheat your oven to 400°F (200°C) for the best garlic bread results. Make certain the oven rack is about 6 inches from the heat source if you want a crispy top.
Give your oven 10-15 minutes to reach the right temperature to guarantee even cooking and perfect browning.
Optimal Temperature Settings
Although you might be tempted to skip preheating, setting your oven to 400°F (200°C) guarantees your garlic bread cooks and toasts evenly. These ideal temperature settings balance thorough baking with a perfect golden crust. If you prefer crispier garlic bread, bump the temperature up to 425°F (218°C) but remember to adjust the baking time slightly to avoid burning.
Always preheat the oven fully before placing your bread inside to guarantee consistent heat distribution. This step is essential for achieving that perfect texture without sogginess. For best results, consider lining your baking sheet with parchment paper to prevent sticking and promote even baking.
Mastering these temperature tips will elevate your garlic bread from good to irresistible every time.
Oven Rack Placement
One key step for perfect garlic bread is placing the oven rack about 6 inches from the heat source during preheating. Proper oven rack placement guarantees even cooking and helps the bread brown nicely without burning. When you preheat the oven, set the baking temperature to 400°F, which is ideal for crisping the bread’s exterior while keeping the inside soft.
Make certain to let the oven reach this temperature fully before sliding your garlic bread inside—this consistency is essential for uniform results. If you’re broiling for that extra crispy top, move the rack to the highest position. Remember, avoiding frequent oven door openings during baking keeps the temperature steady and prevents uneven cooking.
Paying attention to these details will elevate your garlic bread every time.
Preheating Time Tips
After setting your oven rack about 6 inches from the heat source, the next step is to preheat your oven properly. Preheat the oven to 400°F (200°C) to make certain your garlic bread cooks evenly and achieves that perfect crispy texture. Preheating is essential because it helps the bread develop a golden brown finish while keeping the inside soft and buttery.
Make sure to allow at least 10-15 minutes for the oven to reach the desired temperature. Since oven temperature displays can be inaccurate, use an oven thermometer to verify the heat. This small step guarantees your garlic bread will bake just right, avoiding undercooked or burnt results.
Proper preheating sets the foundation for delicious, evenly baked garlic bread every time.
Prepare the Bread

You’ll want to start by choosing a good loaf, like French or Italian bread, for the best texture and flavor. Slice it lengthwise to create two flat surfaces that are perfect for spreading your garlic butter.
Preparing the bread this way guarantees your garlic mixture will soak in evenly while baking.
Choosing the Right Bread
When selecting bread for garlic bread, choosing a high-quality loaf like Italian or French bread makes a big difference in flavor and texture. A loaf of French bread is ideal because its soft, fresh crumb soaks up the garlic butter mixture perfectly. You’ll want to pick a loaf that’s about a pound or 24 inches long for the best results.
For sturdier garlic bread, consider thicker slices by cutting the bread lengthwise.
Here’s what to keep in mind:
- Use a high-quality loaf to guarantee great taste and texture.
- Opt for fresh bread to absorb the garlic butter mixture well.
- Choose thicker slices or halve the loaf lengthwise for a firm base.
This way, your garlic bread will turn out crispy on the outside and flavorful inside.
Slicing Techniques for Bread
Anyone preparing garlic bread knows that how you slice the bread can make all the difference. Start by choosing a fresh loaf of Italian or French bread, then use a serrated bread knife for clean, precise slicing. This helps prevent squishing the loaf and maintains its shape.
For classic garlic bread, slice the loaf in half lengthwise, exposing the cut sides for even distribution of garlic butter. If you prefer extra crispy edges, consider slicing the bread into individual 1-inch pieces. Always place the cut sides facing up on your baking sheet to optimize flavor absorption and toasting.
Mastering these slicing techniques guarantees your garlic bread bakes evenly and tastes delicious every time.
Prepping Bread for Spread
Choose a fresh 1-pound loaf of Italian or French bread and slice it in half lengthwise using a serrated knife to keep the loaf intact. This method prevents the bread from compressing, preserving its airy texture.
Next, lay the cut sides up on a lined baking sheet to create the perfect surface for preparing the spread. Before applying the garlic butter mixture, you might want to sprinkle a little sea salt for added flavor.
Here’s how to prep your bread for the best toasted bread result:
- Use a serrated knife to slice without crushing.
- Place bread cut-side up on a lined baking sheet.
- Preheat the oven to 400°F or 425°F for a crispier finish.
This guarantees your garlic butter mixture bakes evenly into golden, delicious garlic bread.
Make the Garlic Butter Spread
Since the garlic butter spread is the heart of your garlic bread, start by softening ½ cup of unsalted or salted butter. To make the spread, finely mince 4 cloves of fresh garlic and mix them into the softened butter. This gives your spread that bold, authentic garlic flavor you’re aiming for.
Next, add 1 tablespoon of finely chopped fresh parsley to brighten up the mix with a fresh, green touch. Season the garlic butter spread with a pinch of sea salt to balance the flavors perfectly. If you want a cheesy twist, stir in ¼ cup of freshly grated Parmesan cheese before using the spread.
Now, your garlic butter spread is ready, packed with flavor and perfect for the next step.
Apply the Garlic Butter to Bread
Before you start spreading, make sure your butter is softened to room temperature so it glides easily over the bread. This step is key to evenly apply the garlic butter and achieve that perfect homemade garlic bread.
Softened butter spreads smoothly, ensuring an even layer for that perfect homemade garlic bread.
Once softened butter is ready, follow these steps:
- Slice your bread loaf lengthwise, exposing the surface to hold the garlic butter.
- Mix the softened butter with finely minced garlic, fresh parsley, and a pinch of salt for a delicious garlic blend.
- Use a spatula or knife to spread the mixture generously over the bread’s cut sides, reaching the edges for full flavor coverage.
Arrange Bread on Baking Sheet
Start by preheating your oven to 400°F (or 425°F if you want a crispier crust) while you prepare your baking sheet. Line the baking sheet with parchment paper or foil to prevent sticking and make cleanup easier.
Cut your loaf of French or Italian bread in half lengthwise, making sure the cut sides are facing up for spreading the garlic butter mixture. Place the bread halves on the prepared baking sheet, leaving some space between them to allow even heat circulation in the oven.
For an extra touch of flavor, lightly brush the edges of the bread with olive oil before baking. This step guarantees your garlic bread gets that perfect golden crust and deliciously crispy edges.
Bake the Garlic Bread
Once your oven reaches 425°F (or 400°F if you prefer a quicker bake), spread the garlic butter mixture evenly over the cut sides of the bread to assure every bite is flavorful and golden.
Place the bread on a baking sheet with parchment to prevent sticking and facilitate easy cleanup. Now, bake the garlic bread for 10-15 minutes, watching closely for that perfect golden brown crust.
For extra crispiness, you can add 3-5 more minutes but keep an eye to avoid burning. Remember:
- Use a baking sheet with parchment for even cooking
- Bake the garlic bread until the edges turn golden brown
- Spread the garlic butter mixture evenly for full flavor coverage
This method will give you delicious, crispy garlic bread every time.
Add Cheese for a Cheesy Variation
If you want to take your garlic bread to the next level, adding cheese is a simple way to do it. After spreading the garlic butter on your bread, sprinkle 1/4 cup of grated parmesan or 1/2 cup of shredded mozzarella over the top. For a richer flavor, combine both cheeses before baking.
To achieve perfectly melted, bubbly cheesy garlic bread, add the cheese during the last 2 minutes of baking. This guarantees the cheese browns slightly without burning. Keep a close eye on it during this time to get the ideal golden crust.
You can also experiment with other cheeses like cheddar or fontina to customize your cheesy garlic bread. This cheesy variation turns your classic garlic bread into an irresistible treat.
Slice and Serve Warm
After baking your garlic bread until the edges turn golden brown, let it cool just enough so you can handle it safely. Then, use a sharp knife to slice it into 1-inch pieces for easy serving.
To enjoy the full flavor and texture, make certain to serve warm, as this brings out the buttery, garlicky aroma and crispy texture perfectly.
Serving garlic bread warm enhances its buttery aroma and crispy texture for the best taste experience.
Here’s how to finish it off:
- Slice carefully to maintain the crispy crust and soft interior.
- Serve warm immediately to savor the buttery richness.
- Pair with dips like marinara or garlic olive oil for extra taste.
Eating garlic bread right after slicing guarantees you get the best flavor and texture every time.
Store or Freeze Leftover Garlic Bread
Although garlic bread is best enjoyed fresh and warm, you can store or freeze any leftovers to enjoy later without losing too much of that delicious flavor and texture. To store leftover garlic bread, let it cool completely to prevent moisture build-up, then cover it tightly and keep it at room temperature for 1-2 days. Avoid refrigerating, as it can dry out the bread.
If you want to freeze garlic bread, place the cooled halves in a single layer inside a freezer-friendly bag and freeze for up to 3 months. When you’re ready, reheat garlic bread by wrapping it in foil and warming it in the oven at 350°F for about 10 minutes. For frozen bread, bake directly from frozen, adding 3-5 extra minutes to restore its crispiness.
Frequently Asked Questions
How to Make Garlic Bread in Steps?
To make garlic bread, first preheat your oven to around 400°F. Then, mix softened butter with minced garlic and parsley. Slice your bread lengthwise, spread the garlic butter evenly, and place it in the oven.
Bake for 10-15 minutes until golden and crispy. If you like, add cheese near the end. Finally, slice it up and enjoy your warm, delicious garlic bread with any meal!
How to Make Garlic Bread in 10 Minutes?
To make garlic bread in 10 minutes, preheat your oven to 400°F. Slice a loaf of French bread in half, then spread a mix of softened butter, garlic powder, and parsley on each side.
Place the bread on a baking sheet and bake for about 10 minutes until crispy and golden. If you want it extra crunchy, broil it for 1-2 minutes, but watch closely so it doesn’t burn.
How to Make Own Garlic Bread in the Oven?
To make your own garlic bread in the oven, start by preheating it to around 425°F. Mix softened butter with minced garlic, herbs, and a pinch of salt. Slice your bread lengthwise, spread the garlic butter evenly, and bake on a lined sheet for 10-15 minutes until golden and crispy.
If you like, add cheese near the end. Let it cool slightly, then slice and enjoy warm, fresh garlic bread!
How to Make Garlic Bread With 3 Ingredients?
They say, “Simplicity is the ultimate sophistication.” To make garlic bread with just three ingredients, grab a loaf of French or Italian bread, softened butter, and garlic powder.
Slice the bread lengthwise, spread the butter evenly, then sprinkle garlic powder on top. Bake at 400°F for about 10 minutes until golden brown.
You’ll have a delicious, easy garlic bread that’s perfect for any meal or snack.
Conclusion
Now that you’ve mastered making garlic bread in just 10 easy steps, you’re ready to impress like a Renaissance chef with a modern twist. Whether you stick to the classic garlic butter or add cheesy goodness, this recipe’s simple magic never goes out of style—kind of like a knight’s trusty sword.
So, heat up that oven, enjoy every warm, flavorful bite, and don’t forget to save some for later. Your taste buds will thank you! Making garlic bread in the oven has never been easier or more delicious. Keep this easy garlic bread recipe handy for any meal or snack craving.