How to Restain Kitchen Cabinets
To restain your kitchen cabinets, begin by removing all hardware and cleaning the surfaces thoroughly. This ensures even stain application and better adhesion.
Next, strip off the old finish using a chemical stripper or a heat gun. Once the old finish is removed, sand the cabinets progressively with fine-grit sandpaper until the surfaces are smooth.
Choose a stain that complements your wood type and apply it evenly along the grain. Wipe off any excess stain to prevent blotches and achieve a uniform look.
Finally, seal your cabinets with a quality topcoat to protect your work and enhance durability.
Following these steps carefully will assure lasting beauty and protection, with more details available to perfect your approach.
Get the Tools and Materials You’ll Need

Before you begin restaining your kitchen cabinets, gather all the essential tools and materials to guarantee a smooth process. Start with tool selection: you’ll need fine-grit sandpaper, a sanding block or orbital sander, paintbrushes or foam brushes, lint-free cloths, and a quality stain.
Include drop cloths, painter’s tape, and protective gloves. For material preparation, make sure you have wood conditioner if staining softwoods, a wood cleaner or degreaser, and a sealant or topcoat.
Organize these items within reach to maintain workflow efficiency. Confirm all brushes and cloths are clean and free of debris to prevent imperfections. Preparing your tools and materials carefully reduces delays and assures your cabinets achieve an even, professional finish.
This methodical approach sets the foundation for successful cabinet restaining.
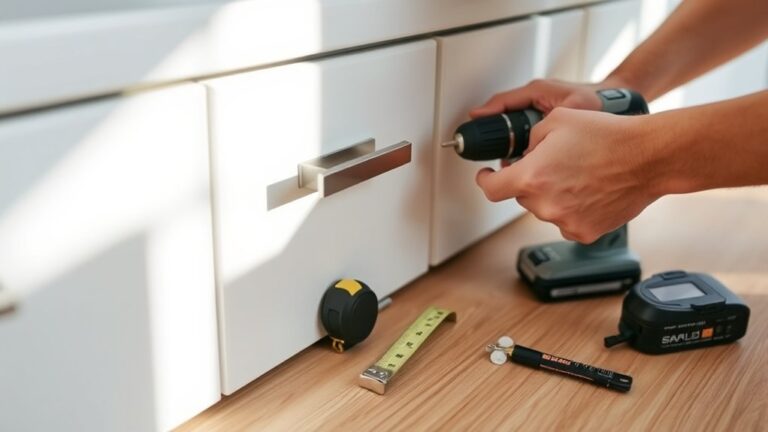
Clean and Remove Hardware to Prep Cabinets
With your tools and materials ready, focus on preparing the cabinets themselves by thoroughly cleaning all surfaces. Start by removing all hardware types, including handles, knobs, and hinges, to guarantee an even stain application. Follow these steps:
- Use a screwdriver to carefully remove each piece of hardware, placing screws and parts in a labeled container.
- Choose appropriate cleaning methods for your cabinet finish; a mild detergent solution works well for most wood surfaces.
- Wipe down the cabinets with a soft cloth soaked in the cleaning solution, removing grease, dirt, and residues.
- Dry the surfaces completely with a clean cloth to prevent moisture from interfering with the staining process.
This careful prep guarantees your cabinets are perfectly clean and hardware-free for a smooth restaining job.
Choose the Best Stain Color and Type
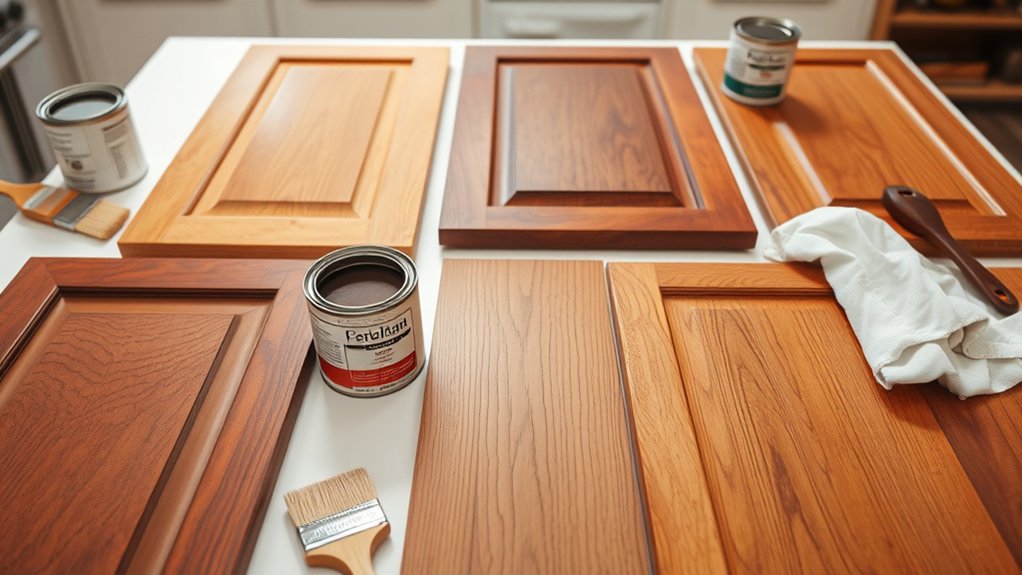
How do you select the best stain color and type to enhance your kitchen cabinets? Start by identifying the wood type, as each absorbs stain differently, affecting the final shade. For example, oak’s open grain soaks up stain unevenly, while maple’s tight grain yields a smoother finish.
Choose a stain color that complements your kitchen’s lighting and existing décor; test samples on a cabinet scrap or hidden area to see the true effect. Consider whether you want a transparent stain to highlight the wood’s natural character or a semi-transparent one for subtle color.
Also, decide between oil-based stains for durability or water-based for easier cleanup. Taking these factors into account guarantees your cabinets look polished and cohesive.
Remove Old Finish and Sand Cabinets Properly
You’ll start by applying a chemical stripper to remove the old finish evenly, following the manufacturer’s instructions carefully. Once the finish is gone, sand the cabinets using progressively finer grits, starting with 120 and finishing with 220, to create a smooth surface for staining.
Be sure to sand along the grain and clean off all dust before moving on to the next step.
Stripping Old Finish
Begin by removing the old finish from your kitchen cabinets to guarantee a smooth, even surface for the new stain. Focus on effective stripping methods to ascertain thorough finish removal without damaging the wood. Follow these steps:
- Choose a chemical stripper or a heat gun based on your cabinet type and finish thickness.
- Apply the stripper evenly with a brush, allowing it to penetrate and soften the old finish.
- Use a plastic scraper to gently lift away the loosened finish, avoiding gouges or scratches.
- Clean the surface with mineral spirits or water to remove residue, preparing the cabinets for sanding.
This methodical approach to stripping ascertains the best finish removal, setting the stage for a flawless restain.
Sanding Techniques and Tips
Although stripping removes most of the old finish, sanding guarantees the surface is perfectly smooth and ready to absorb the new stain evenly. Start with coarse grit sandpaper (80-120 grit) using an orbital sander to remove remaining finish and smooth rough surfaces. Use sanding patterns that follow the wood grain to prevent scratches.
Switch to finer grit (220 grit) for finish sanding, making certain an even, smooth surface. For edges and detailed areas, hand sanding is essential to avoid damage. Always wear safety precautions like a dust mask and goggles.
After sanding, thoroughly remove dust with a vacuum and tack cloth to make certain a clean surface. Proper grit selection, sanding techniques, and dust removal are key steps to achieve professional results when you sand cabinets.
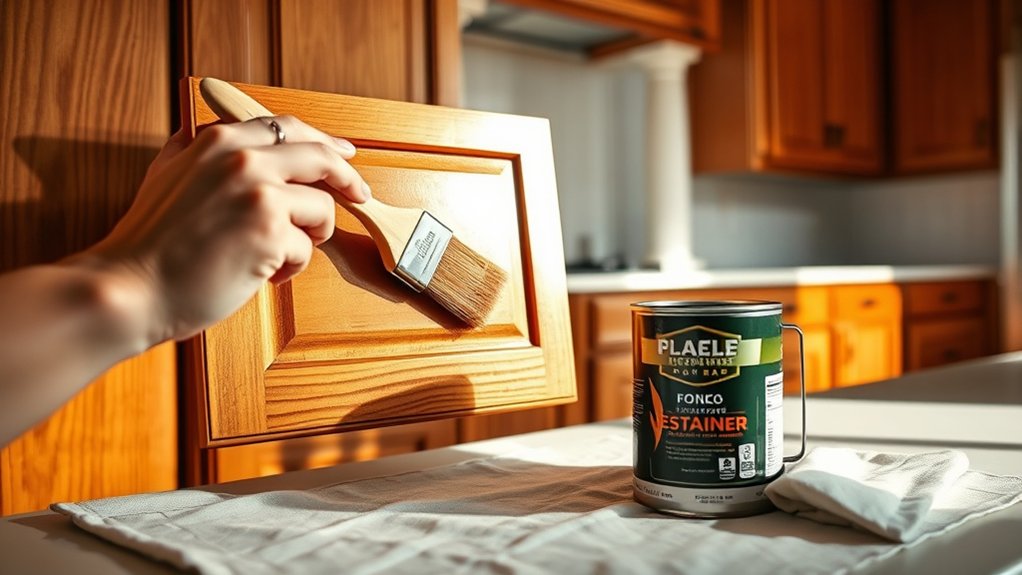
Apply Stain Evenly for a Smooth Finish
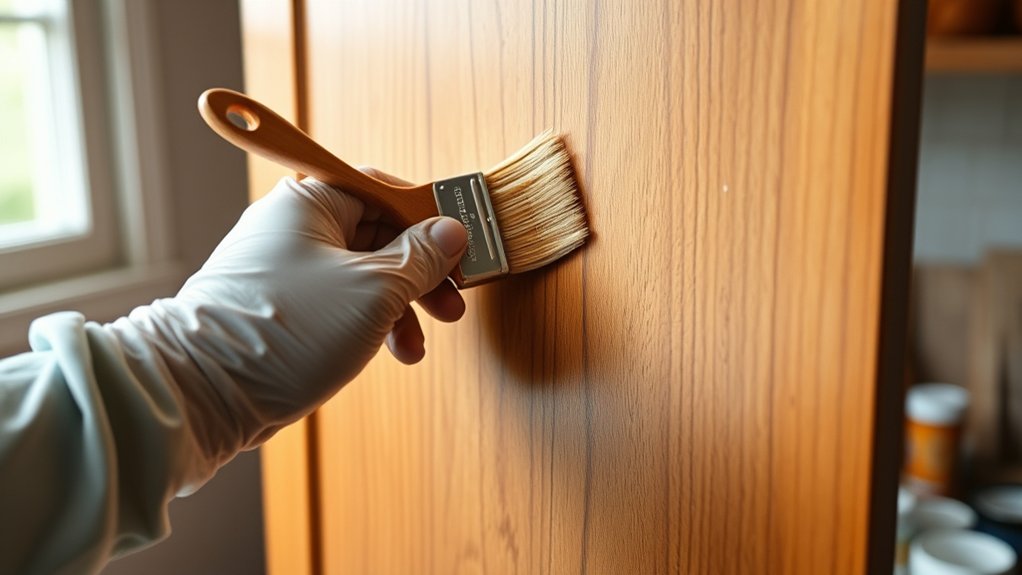
Choose a high-quality brush designed for staining to guarantee smooth application. Keep your strokes consistent and always follow the wood grain to avoid uneven patches.
This method helps the stain absorb uniformly, giving your cabinets a flawless finish.
Choose The Right Brush
A high-quality brush plays an essential role in applying stain evenly and achieving a smooth finish on your kitchen cabinets. Selecting the right brush type and mastering brush techniques will elevate your results. Here’s how to choose effectively:
- Opt for natural bristle brushes when using oil-based stains; synthetic ones suit water-based stains better.
- Choose a brush size that fits your cabinet dimensions, smaller for detailed areas, larger for broad surfaces.
- Verify the brush has tapered bristles for smooth application and minimal streaking.
- Avoid brushes with loose bristles, which can shed and ruin the finish.
Maintain Consistent Strokes
Maintain steady, even strokes as you apply the stain to prevent blotches and streaks. Begin by loading your brush evenly but avoid over-saturating it, which can cause drips.
Use long, continuous brush techniques, moving smoothly in one direction to guarantee uniform stain application. Work methodically across each cabinet surface, overlapping slightly with each stroke to blend edges seamlessly.
Maintain consistent pressure to keep the stain thickness even. If you spot excess stain pooling, gently smooth it out immediately with your brush.
Take breaks to inspect your progress under good lighting, correcting any uneven areas before the stain dries. Precise brush techniques combined with steady, consistent strokes are key to achieving a flawless, smooth finish on your kitchen cabinets.
Work With Wood Grain
Following the natural direction of the wood grain guarantees the stain penetrates evenly and enhances the cabinet’s texture. To work effectively with different wood grain types and achieve a grain enhancing finish, follow these steps:
- Identify the wood grain type, straight, wavy, or knotty, to adjust your staining technique accordingly.
- Apply stain in long, consistent strokes along the grain direction, avoiding cross-grain brushing.
- Use a clean cloth to wipe off excess stain gently, maintaining the grain’s visibility and preventing blotches.
- Let the stain dry completely before applying additional coats, ensuring smooth, even absorption and a uniform finish.
Seal Cabinets to Protect Your New Finish
Apply a high-quality sealant to your cabinets to lock in the new stain and shield the wood from moisture, heat, and daily wear. Start by choosing a sealant designed for cabinet protection, such as polyurethane or water-based varnish, which offers excellent finish durability.
Before applying, verify the stained surface is completely dry and free of dust. Use a fine synthetic brush, and apply thin, even coats along the wood grain to avoid bubbles or streaks. Allow each coat to dry thoroughly before lightly sanding with fine-grit sandpaper to promote adhesion between layers.
Repeat for two to three coats, depending on the product’s instructions. Proper sealing not only enhances the stain’s appearance but also extends your cabinets’ lifespan by providing a robust barrier against kitchen hazards.
Troubleshoot Common Restaining Problems
When you encounter uneven staining, blotchiness, or peeling, it’s important to identify the underlying cause before proceeding. Troubleshooting common restaining problems helps you correct issues efficiently.
- Blotchy stains and uneven color: These often result from inadequate sanding or dust particles on the surface. Sand thoroughly and wipe clean before staining.
- Streaky finish and sticky residue: Typically caused by application errors or using incompatible products. Apply stain evenly, and check product compatibility.
- Drying issues and odor problems: Poor ventilation or high humidity can delay drying and cause lingering odors. Maintain a well-ventilated workspace.
- Fading over time: This signals insufficient sealing or exposure to sunlight. Use proper sealers and consider UV-protective finishes to maintain color longevity.
Maintain Your Restained Cabinets for Long-Lasting Beauty
Addressing common staining problems sets the stage for preserving your cabinets’ refreshed look over time. To maintain your restained cabinets, establish a routine cabinet cleaning schedule using a mild detergent and soft cloth to prevent buildup that can dull the finish. Avoid harsh chemicals that may degrade the stain or protective topcoat.
Pay attention to stain selection when you initially restain; choosing a durable, water-resistant stain simplifies ongoing maintenance. Regularly inspect for any signs of wear or discoloration and promptly address them with touch-ups using the original stain to guarantee color consistency.
Additionally, minimize direct exposure to moisture and heat by using exhaust fans and wiping spills immediately. By following these methodical steps, you’ll extend the life and beauty of your restained cabinets efficiently and effectively.
Frequently Asked Questions
Can I Restain Cabinets Without Removing Them From the Kitchen?
Yes, you can restain cabinets without removing them by focusing on thorough cabinet preparation like cleaning and sanding. Use careful staining techniques, such as applying thin coats and protecting surrounding areas to avoid mess and guarantee even color.
How Long Should I Wait Before Using the Cabinets After Staining?
How long should you wait before using cabinets after staining? Drying time varies by stain types. Oil-based stains need 24-48 hours, while water-based stains take about 6-8 hours. Always check manufacturer’s instructions to verify a proper cure before use.
Is It Safe to Restain Cabinets in a Small, Enclosed Space?
It’s not safe to restain cabinets in a small, enclosed space without ventilation. Use ventilation tips like fans and open windows, and follow safety precautions by wearing masks and gloves to avoid inhaling fumes and skin contact.
Can I Change the Cabinet Color From Dark to Light by Restaining?
Changing cabinet color from dark to light demands diligent diligence. You can’t simply stain lighter; color transformation requires stripping, bleaching, or sanding first.
Employ precise staining techniques after preparation to achieve your desired, dazzling, and durable finish.
What Type of Gloves Should I Use When Staining Cabinets?
You should use nitrile or latex glove types for stain protection, as they resist chemicals well and prevent skin contact. Avoid cotton gloves since they absorb stains.
Make certain gloves fit snugly for precise handling during application.