How to Grill Chicken Without a Grill: Step-by-Step Guide
You can easily grill chicken without a grill by using alternative methods like your oven broiler or stovetop skillet.
These techniques provide a convenient way to enjoy grilled chicken indoors. Start by marinating the chicken in yogurt and spices for at least an hour to tenderize it.
Preheat your broiler with a wire rack, or heat a cast-iron skillet for a perfect sear. Cook each side for 7–8 minutes, aiming for an internal temperature of 165°F.
Then, let it rest to lock in the juices.
Keep going to discover tips for timing, seasoning, and serving. These simple steps will help you achieve delicious, grilled chicken flavor without needing an outdoor grill.
Key Takeaways
- Preheat your oven’s broiler and position the rack in the top third for high heat exposure.
- Use a foil-lined sheet pan with a wire rack and spray with nonstick spray for even cooking.
- Season or marinate chicken thoroughly, letting it rest at room temperature for 20 minutes before cooking.
- Broil chicken 7–8 minutes per side, flipping once, and check for an internal temperature of 165°F.
- Let chicken rest under foil for 10 minutes after cooking to lock in moisture and enhance juiciness.
Preparing Your Chicken for Cooking
Before you start cooking, it’s important to prepare your chicken properly to secure the best flavor and texture. Start by choosing high-quality chicken, like organic or free-range, to guarantee better taste and nutrition. When preparing your chicken, drying it thoroughly with paper towels is essential; this step helps achieve a crispy exterior when cooking.
Let your chicken come to room temperature for about 20 minutes before you cook it, so it cooks evenly. To get juicy chicken, marinate it in yogurt for at least an hour—this tenderizes the meat and adds moisture. Before cooking, make certain to season both sides evenly with your preferred spice mix to enhance the flavor.
Taking these steps will set you up for perfectly cooked chicken, even without a grill.
Choosing the Right Marinade and Seasonings
Once your chicken is prepped and ready, the next step is to focus on selecting a marinade and seasonings that will bring out its best flavors. Choosing the right marinade sets the foundation for a delicious chicken recipe. You can enhance your marinade by adding ingredients like chili paste, lemon juice, or garlic to complement the chicken’s natural taste.
Remember to pat your chicken dry before applying any marinade or seasonings—this helps achieve a crispier exterior. For seasonings, a blend of garlic powder, paprika, and oregano works beautifully as a dry rub, adding depth and aroma. Let your chicken soak up the marinade for at least an hour; longer marinating times, up to 24 hours, will intensify the flavor.
How to Marinate Chicken Using Yogurt
If you want tender, juicy chicken with a crispy exterior, marinating it in yogurt is a simple and effective method. Yogurt acts as a natural tenderizer, breaking down proteins to keep the chicken moist and flavorful. To marinate chicken, use about ½ cup of plain or Greek yogurt for 1½ to 2 pounds of chicken.
Mix in extras like chili paste, lemon juice, or minced garlic to boost flavor. Let the chicken soak in this yogurt mixture for at least 1 hour, though marinating up to 24 hours will maximize tenderness and taste. Before cooking, bring your marinated chicken to room temperature for about 20 minutes to guarantee even cooking.
This yogurt-based marinade not only tenderizes but also helps retain juiciness, making it perfect for grilling or broiling without a grill. Using yogurt to marinate chicken is a reliable way to get that desirable balance of moistness and crispiness every time.
Setting Up Your Oven for Broiling
Marinated chicken that’s been brought to room temperature is ready to cook, and broiling in the oven is a great way to mimic grilling without needing an outdoor grill. When setting up your oven for broiling, start by positioning the oven rack in the top third of the oven. This placement guarantees your chicken gets maximum heat exposure, helping it cook evenly and develop a nice char.
Next, preheat the oven to the lowest broil setting. This gentle heat prevents burning while still giving you that grilled effect.
Line a large sheet pan with foil for easy cleanup, then place a wire rack on top. Spray the wire rack with nonstick cooking spray or brush it lightly with oil to keep the chicken from sticking. With your oven ready and chicken prepped, you’re all set to broil a delicious, grill-like meal right inside your kitchen.
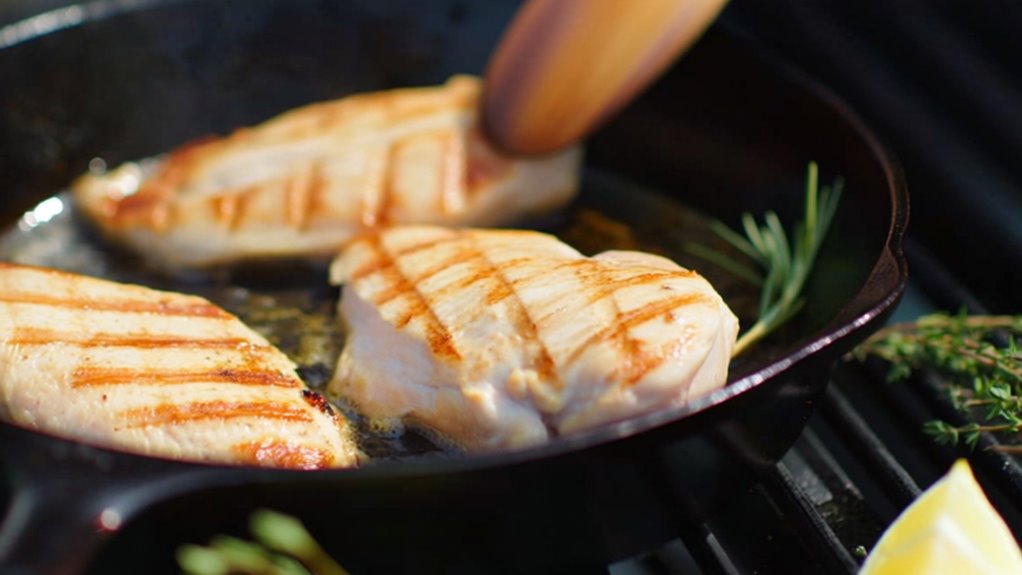
Cooking Chicken on the Stovetop: Essential Tips
A cast-iron skillet or grill pan is your best friend when cooking chicken on the stovetop, as it holds heat well and helps you get a perfect sear. Start by patting your chicken dry and seasoning both sides to boost flavor and create a crispy crust. Preheat your pan over medium-high heat, then add a bit of cooking fat like olive oil or butter.
Once hot, place the chicken in the pan and cook it for about 7 minutes on each side. This cooking method guarantees even cooking and a delicious sear. It’s vital to check the internal temperature using a meat thermometer; your chicken should reach 165°F to be safe and juicy.
After cooking, let the chicken rest for 5 minutes—this locks in moisture. Following this recipe will give you stovetop chicken that’s flavorful, tender, and perfectly cooked every time.
Step-by-Step Broiling Method for Juicy Chicken
When stovetop cooking isn’t an option, broiling offers a great way to achieve juicy, flavorful chicken with a nicely browned exterior. Start by marinating your chicken breasts in ½ cup of yogurt for at least an hour to tenderize and lock in moisture. Preheat your oven to the lowest broil setting and place the rack in the top third.
Broil the chicken under high heat, cooking 7–8 minutes on the first side until it browns, then flip for another 5 minutes. Always check that the internal temperature hits 165°F to guarantee safety and doneness. Finally, rest the chicken under foil for 10 minutes to keep it juicy.
| Step | Details |
|---|---|
| Marinate | Yogurt, 1 hour |
| Broil | High heat, 7–8 min + 5 min |
| Rest & Check | 10 min rest, 165°F internal temp |
Flipping and Timing Guidelines for Perfect Results
Although broiling chicken is straightforward, mastering the timing and flipping technique is key to juicy, evenly cooked results. Start by cooking the chicken for 7–8 minutes on the first side until it begins to brown but isn’t fully cooked. Then, flip the chicken using tongs and continue cooking.
For boneless pieces, cook for an additional 5 minutes; for bone-in, 7–8 minutes is best. After that, flip the chicken back to the original side and broil for another 2–3 minutes to achieve a nicely charred exterior.
Keep an eye on the overall cooking time to avoid overcooking or dryness. Although you shouldn’t check doneness just yet, it’s helpful to have a meat thermometer ready for the next steps to guarantee safety. Following this flipping and timing method will help you get perfectly cooked chicken every time, even without a grill.
Checking Chicken Doneness and Internal Temperature
Since verifying your chicken is fully cooked is essential for safety, you’ll want to use a meat thermometer to check its internal temperature. Insert the thermometer into the thickest part of the skinless chicken breast or thigh, making sure to avoid bones for an accurate reading. When the internal temperature hits at least 165°F (75°C), your chicken is safe to eat.
Checking chicken doneness isn’t just about temperature; visually, the meat should be completely white inside with no pink areas. If the temperature hasn’t reached the safe minimum, keep cooking and check again every few minutes. This method assures that your skinless chicken is perfectly cooked without drying out or remaining underdone.
Resting Your Chicken for Maximum Juiciness
Once your chicken is cooked, don’t rush to cut into it right away. Let it rest under foil for at least 10 minutes to let the juices redistribute and keep the meat moist.
This simple step makes a big difference in flavor and texture.
Importance of Resting
When you let your chicken rest under foil for at least 10 minutes after cooking, you give the juices time to redistribute, making every bite juicy and flavorful. This resting period is essential to lock in moisture and enhance juiciness, preventing dryness that happens if you cut into the chicken too soon.
During this time, the internal temperature can rise slightly, ensuring safe consumption without losing quality.
| Benefit | Explanation |
|---|---|
| Juiciness | Juices redistribute, improving flavor |
| Moisture retention | Prevents moisture loss upon cutting |
| Texture enhancement | Results in tender, enjoyable bites |
Respecting this resting period guarantees your chicken’s best texture and taste every time.
Resting Time Benefits
Allowing your chicken to rest for at least 10 minutes after cooking makes a noticeable difference in juiciness and flavor. During this resting time, the meat’s juices redistribute evenly, preventing moisture loss that would otherwise leave your chicken dry. If you cut into your chicken right away, those flavorful juices escape, resulting in a less tender bite.
Serving Suggestions and Meal Pairings
Although you don’t have a grill, you can still enjoy versatile serving options with pan-grilled chicken. You can serve grilled chicken breasts over pasta, drizzled with pesto or a light sauce for a satisfying meal. Shredded grilled chicken also works great as a filling for sandwiches, wraps, or tacos, adding a tasty protein boost to your lunch.
When it comes to side dishes, pair your grilled chicken with roasted vegetables, quinoa, or a fresh green salad to keep the meal balanced and nutritious. For more flavor, try serving grilled chicken with a yogurt-based sauce or marinade, which enhances both taste and texture. Another great meal pairing is adding grilled chicken to hearty grain bowls featuring brown rice, beans, and fresh veggies—perfect for a wholesome, filling dinner.
These serving suggestions and meal pairings make pan-grilled chicken a versatile choice, even without a traditional grill.
Frequently Asked Questions
How Do You Grill Chicken Without a Grill?
You can grill chicken without a grill by using a cast-iron skillet or grill pan. Just season your chicken and let it sit at room temperature for about 45 minutes.
Preheat your pan with some oil or butter, then cook the chicken for 6-7 minutes on each side until it hits 165°F inside.
Don’t forget to let it rest a bit afterward to keep it juicy and flavorful!
How to Grill Chicken on Top of the Stove?
Grilling chicken on your stove is so easy, it’s like having a backyard barbecue right in your kitchen! Just heat a cast-iron skillet over medium-high heat, add some oil or butter, and place your seasoned chicken breasts inside.
Cook each side for about 7 minutes, checking they hit 165°F inside. Let them rest for 5 minutes afterward to lock in those juicy flavors.
You’ll get that perfect grilled taste without ever firing up an outdoor grill!
How Do You Grill if You Don’t Have a Grill?
If you don’t have a grill, you can use a cast-iron skillet or a grill pan on your stove. Preheat it over medium-high heat with a bit of oil to get that nice sear.
Season your chicken well and cook it about 7 minutes per side, making sure it reaches 165°F inside. Let it rest before slicing to keep it juicy and flavorful.
It’s a great way to enjoy grilled chicken without an actual grill!
How to Get Grilled Chicken Flavor Without Grill?
You don’t need a grill to get that smoky, charred flavor—surprising, right? Just marinate your chicken in a spiced yogurt mix, then sear it hot in a cast-iron skillet to mimic that grill’s high heat.
Add a pinch of smoked paprika or liquid smoke for that elusive smoky taste. Finish by letting it rest so the juices stay locked in.
Voilà—grilled flavor, no grill required!
Conclusion
Now that you know how to grill chicken without a grill, why settle for less when juicy, flavorful chicken is just an oven or stovetop away? With the right prep, marinade, and cooking techniques, you can achieve that perfect char and taste anytime.
So, are you ready to impress your taste buds and guests without firing up an outdoor grill? Give it a try—you’ll wonder why you ever thought grilling needed flames! Mastering how to grill chicken without a grill means delicious grilled chicken is always within reach, no matter your kitchen setup.