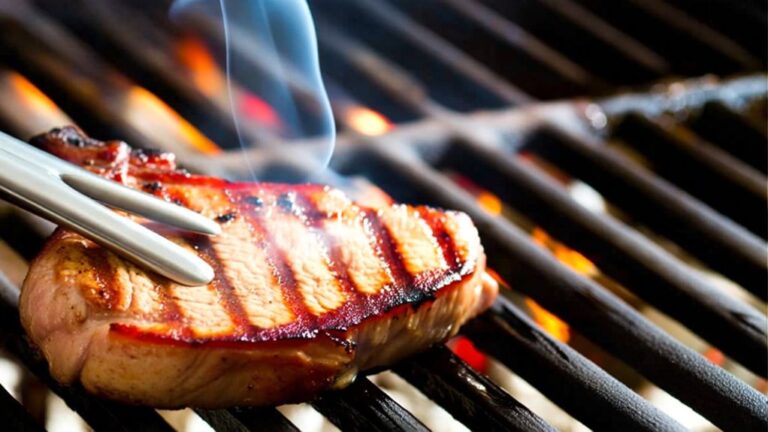
How Long to Grill Tri-Tip Step by Step
To grill tri-tip, start by seasoning it well and preheating your grill to 350°F with indirect heat on one side.
Grilling tri-tip requires attention to temperature and timing to achieve the perfect balance of flavor and tenderness. Cook the tri-tip over indirect heat, flipping every 6-7 minutes for 30 to 50 minutes depending on size and desired doneness.
Use a thermometer to check for 125°F (rare) up to 160°F (well done).
Finish by searing over direct heat for a crusty exterior, then let it rest before slicing.
Keep going to discover tips on seasoning, heat setup, and slicing for maximum flavor and tenderness.
Key Takeaways
- Preheat grill to 350°F using a two-zone setup with direct and indirect heat zones.
- Season tri-tip thoroughly and let it rest at room temperature before grilling.
- Grill tri-tip over indirect heat, flipping every 6-7 minutes for 30 to 50 minutes, monitoring internal temperature.
- When internal temperature reaches 115°F (rare) or 125°F (medium rare), sear tri-tip on direct heat for 2-3 minutes per side.
- Rest tri-tip for 10-15 minutes after grilling, then slice against the grain before serving.
Choosing the Right Tri-Tip Cut
Picking the right tri-tip starts with understanding its size and shape. This cut of meat typically weighs between 2 to 3 pounds when trimmed, making it perfect for manageable grilling sessions. You’ll notice its distinctive triangular shape, which comes from the bottom portion of the sirloin.
When selecting your tri-tip, choose one with good marbling; the fat streaks enhance both tenderness and flavor as it cooks. Be aware that an untrimmed tri-tip can weigh up to 5 pounds, which means you’ll need to adjust your cooking time accordingly. The tri-tip wasn’t always a household name—it gained popularity in the 1960s, previously known as the triangular part of the loin butt.
Understanding these details helps you pick the ideal cut of meat, ensuring your grilling experience is both efficient and delicious.
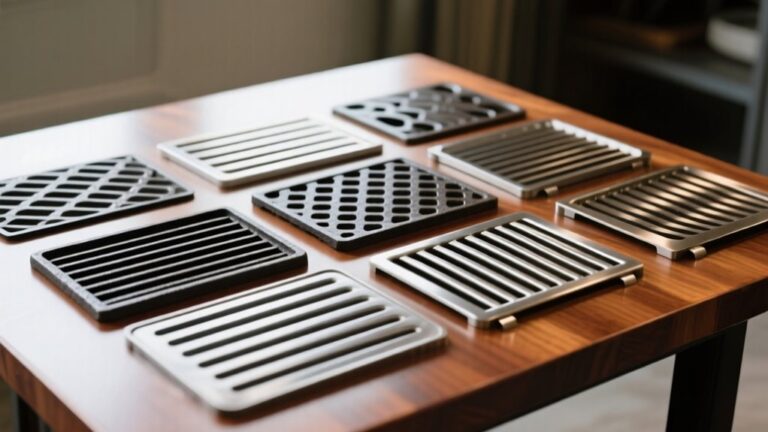
Preparing Your Grill for Tri-Tip
To get your tri-tip grilling perfectly, start by preheating your grill to 350 degrees Fahrenheit using a two-zone setup. This method creates a hot direct heat side for searing and a cooler indirect side for slow cooking, giving you full control over the cooking process. While the grill heats, make certain your grill grates are clean and lightly oiled to prevent the tri-tip from sticking.
This step is essential for achieving those beautiful sear marks and easy flipping. Next, let your tri-tip rest at room temperature to guarantee even cooking once it hits the grill. Preparing a mopping liquid—combining olive oil, red wine, red wine vinegar, and crushed garlic—can be handy for basting during grilling, enhancing flavor without overpowering the meat.
Finally, have an instant-read thermometer ready to monitor the internal temperature accurately, so you can grill your tri-tip to your preferred level of doneness with confidence.
Essential Seasoning Tips for Tri-Tip
Although tri-tip is flavorful on its own, seasoning it well can elevate your grilling experience considerably. Start by applying about 2 tablespoons of a beef rub or your homemade dry rub evenly over all sides of the meat. For deeper flavor, try seasoning your tri-tip overnight in the fridge—this allows the spices to really penetrate.
One of the best seasoning tips is to brush the tri-tip with an herb blend made from sage, thyme, rosemary, and basil while grilling. This adds a fresh, aromatic layer to your meat. Additionally, mopping the tri-tip every 6-7 minutes with a mixture of olive oil, red wine, red wine vinegar, and crushed garlic keeps it moist and flavorful throughout cooking.
Don’t hesitate to experiment with different seasoning methods and timing to discover what suits your taste best. These essential seasoning tips will help you reveal the full potential of your tri-tip on the grill.
Setting Up Two-Zone Heat on the Grill
To set up two-zone heat, preheat one side of your grill to medium-high for direct cooking and keep the other side cooler for indirect heat. On a charcoal grill, arrange the coals to one side, or just light half the burners on a gas grill to create these zones.
Managing the temperature on both sides allows you to sear the tri-tip perfectly and then finish cooking it evenly without burning.
Two-Zone Heat Basics
When you set up two-zone heat on your grill, you create distinct cooking areas—one side with direct heat and the other with indirect heat—giving you greater control over how your tri-tip cooks. This setup lets you sear the meat over the direct heat first, then finish cooking it slowly on the indirect heat side without burning.
Here’s how to get started:
- Preheat your grill to about 350°F.
- Turn on the burners or arrange coals on one side only, leaving the other side off for indirect heat.
- After searing, move your tri-tip to the indirect heat side to cook through evenly, flipping every 6-7 minutes.
This two-zone method guarantees even cooking and better flavor by managing heat precisely.
Arranging Charcoal Placement
Setting up two-zone heat on a charcoal grill means arranging your coals carefully so one side gets direct heat while the other stays empty for indirect cooking. Start by lighting your charcoal in a chimney starter and wait until the coals are ashed over.
Then, spread them evenly on one side of the grill to create consistent direct heat, ideally around 350°F. Leave the opposite side clear for indirect cooking, which is perfect for slow-roasting your tri-tip. Place a drip pan under the indirect side to catch drippings and prevent flare-ups.
This arrangement lets you sear over direct heat and then move the meat to the cooler side to finish cooking gently. Proper charcoal placement is key to mastering your charcoal grill’s two-zone setup.
Managing Temperature Zones
Arranging your coals for two-zone heat sets the stage, but managing those temperature zones throughout grilling makes all the difference. To properly set up two-zone heat, preheat one side of your grill to 350°F for indirect cooking, leaving the other side cooler for searing. Managing temperature zones lets you control the cooking process, ensuring your tri-tip cooks evenly without burning.
Follow these steps:
- Cook the tri-tip on the indirect heat side for 30-50 minutes to cook through gently.
- Move the meat to the direct heat side for a quick sear, creating a flavorful crust.
- Use an instant-read thermometer to monitor internal temperature and adjust zones if needed.
Consistently managing temperature zones guarantees a perfectly cooked tri-tip every time.
Step-by-Step Grilling Process
To grill tri-tip perfectly, you’ll start by preheating your grill to 350°F and preparing a two-zone setup for even cooking. Next, season the tri-tip roast thoroughly on all sides with your favorite rub, whether it’s a store-bought blend like Hey Grill Hey Beef Rub or a homemade dry rub.
Place the tri-tip over indirect heat and grill, flipping every 6-7 minutes to cook evenly. Keep an eye on the internal temperature using an instant-read thermometer. Once it hits 115°F for rare or 125°F for medium rare, move the tri-tip to direct heat.
Sear it for 2-3 minutes per side to lock in those flavors and get a perfect crust. Total cooking time usually ranges from 30 to 50 minutes, but focusing on the internal temperature guarantees you reach your desired doneness precisely. This step-by-step approach assures a juicy, flavorful tri-tip every time.
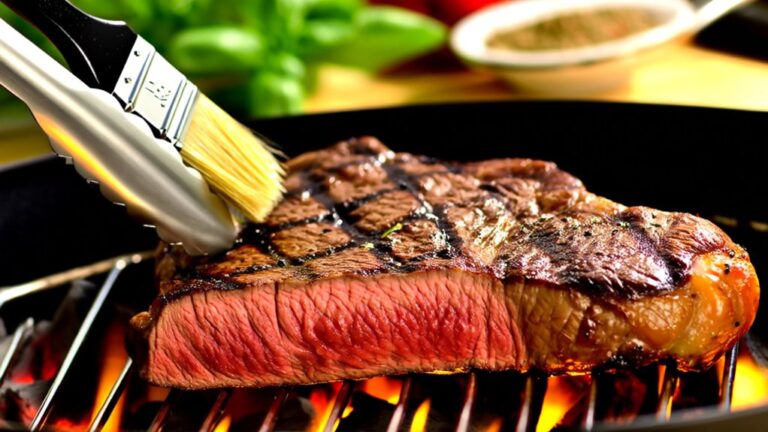
How to Mop Tri-Tip While Grilling
While your tri-tip grills, mopping it regularly with a flavorful liquid will keep it moist and enhance its taste. Before you start, prepare a mopping liquid using 1/4 cup olive oil, 1/4 cup red wine, 2 tablespoons red wine vinegar, and 4 cloves of crushed garlic.
Mop your tri-tip with a savory mix of olive oil, red wine, vinegar, and garlic for juicy, flavorful results.
Then, mop the tri-tip every 6-7 minutes while it cooks over indirect heat. Here’s how to do it effectively:
- Use a basting brush or mop to gently apply the liquid, ensuring an even coating without washing away the seasoning.
- Continue mopping every 6-7 minutes to maintain moisture and build a delicious crust.
- Stop mopping once the internal temperature reaches 115°F for rare or 125°F for medium-rare, then proceed to sear.
Consistent mopping throughout grilling keeps your tri-tip juicy and flavorful, setting you up for a perfect finish.
Timing and Flipping Guidelines
You’ll want to flip your tri-tip every 6 to 7 minutes to cook it evenly over indirect heat. The total grill time usually ranges between 30 to 50 minutes, depending on your grill’s temperature.
Keeping a close eye on timing and flipping helps you achieve that perfect, juicy finish.
Flipping Frequency Tips
Although grilling tri-tip requires patience, flipping it every 6 to 7 minutes over indirect heat guarantees even cooking and allows the meat to soak up the flavors from your mopping liquid.
When using a gas grill, this flipping frequency tip helps maintain consistent temperature and prevents overcooking.
Follow these key steps for ideal results:
- Keep your gas grill steady at around 350°F for even heat distribution.
- Flip the tri-tip every 6-7 minutes, checking the internal temperature with an instant-read thermometer.
- Once the tri-tip reaches 115°F (rare) or 125°F (medium rare), move it to direct heat and sear 2-3 minutes per side for a flavorful crust.
This approach guarantees juicy, perfectly cooked tri-tip every time.
Total Grill Time
Grilling tri-tip usually takes between 30 and 50 minutes, depending on your grill’s temperature and how well done you like your meat. The total grill time varies with heat consistency and your preferred doneness. Start by cooking the tri-tip over indirect heat, flipping every 6-7 minutes to guarantee even cooking.
Once it reaches an internal temperature of 115°F for rare or 125°F for medium-rare, move it to direct heat. Here, sear each side for 2-3 minutes to develop a perfect crust. Remember, relying on total grill time alone isn’t enough.
Always use an instant-read thermometer to check internal temperature for accuracy. This approach guarantees your tri-tip is grilled just right, juicy, and flavorful every time.
Internal Temperature Targets for Doneness
How do you know when your tri-tip is perfectly cooked? The key lies in understanding the internal temperature targets for doneness, which help you achieve the ideal tenderness and flavor. Using a meat thermometer guarantees accuracy and helps avoid overcooking.
Knowing your tri-tip’s internal temperature is essential for perfect tenderness and flavor every time.
Here are the internal temperature targets for doneness to guide you:
- Rare: Remove at 125°F for a tender, juicy center.
- Medium Rare: Aim for 135°F to get a warm red center that’s slightly firmer.
- Medium: Pull at 145°F, where the center is pink and the texture is firmer but still juicy.
If you prefer medium well or well done, aim for 155°F or 160°F, respectively, but keep in mind the meat will be less juicy and more cooked through. Monitoring these temperatures lets you grill tri-tip just the way you like it every time.
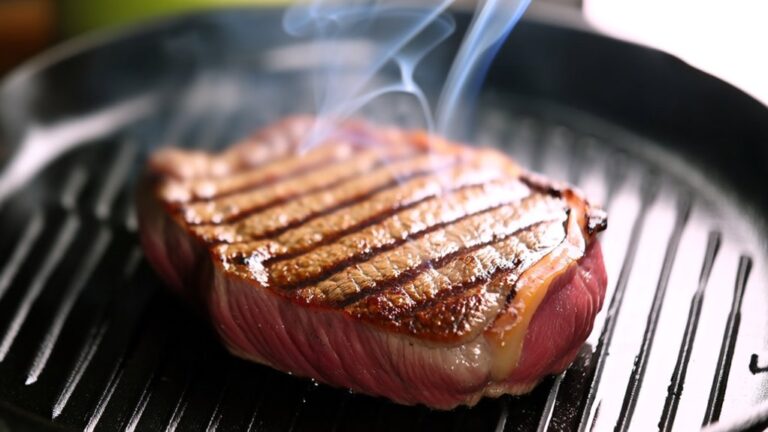
Searing Tri-Tip for Perfect Crust
Since a great crust locks in flavor and juices, searing your tri-tip over high direct heat is crucial. Start by preheating your grill to around 350°F to make certain it’s hot enough for a perfect sear. Once your tri-tip reaches an internal temperature between 115°F (rare) and 145°F (medium), move it to direct heat.
Place the meat on the grill and let it sear undisturbed for 2-3 minutes per side. This will create that delicious grilled crust everyone loves without overcooking the interior. Avoid flipping too often; patience here pays off with a rich, caramelized exterior.
Use an instant-read thermometer to monitor the internal temp closely during searing, so you hit your desired doneness exactly. Following these steps guarantees a beautifully seared tri-tip with a flavorful, crusty finish that makes your delicious grilled meat stand out every time.
Resting and Serving Your Grilled Tri-Tip
Once your tri-tip is off the grill, let it rest for 10-15 minutes to lock in those juices and improve texture. When you’re ready to serve, slicing against the grain is key for tenderness.
Pair it with sides like grilled veggies or mashed potatoes, and consider adding a drizzle of sauce to elevate the flavors even more.
Importance of Resting
Although it might be tempting to slice into your tri-tip right off the grill, letting it rest for 10-15 minutes is crucial to keep it juicy and flavorful. Resting allows the meat’s juices to redistribute, preventing moisture loss and enhancing tenderness.
Here’s why resting matters:
- The internal temperature rises 5-10°F during resting, so pull it from the grill slightly earlier.
- Cover the tri-tip loosely with foil to retain warmth without steaming, preserving the crust.
- Resting improves overall flavor and texture, making every bite more enjoyable.
Skipping this step risks losing precious juices and flavor. By taking a moment to rest your tri-tip, you guarantee a perfectly juicy and delicious roast every time.
Serving Suggestions
Letting your tri-tip rest sets the stage for how you serve it. After grilling, allow it to rest for 10-15 minutes so the juices redistribute, boosting flavor and tenderness. When ready, slice the tri-tip against the grain—this keeps each piece tender and easy to chew.
Before grilling, seasoning with salt and pepper is essential, but you can also sprinkle a bit more on the slices to enhance the taste. Serve your tri-tip with sides like roasted vegetables, mashed potatoes, or a fresh salad to balance the rich meat. For extra flavor, drizzle leftover mopping liquid or chimichurri sauce over the slices.
Finally, garnish the platter with fresh herbs or lemon wedges for a vibrant, inviting presentation.
Frequently Asked Questions
How Long Does It Take to Cook a Tri Tip on the Grill?
It usually takes you about 30 to 50 minutes to grill a tri-tip, depending on your grill’s heat and how you like it cooked. You’ll want to flip it every 6-7 minutes over indirect heat, then sear it for a few minutes on each side.
Keep an eye on the internal temperature—125°F for rare, 135°F for medium rare. Don’t forget to let it rest before slicing for the best flavor.
What Is the 3 3 2 2 Rule for Steak?
Think of the 3 3 2 2 rule as your steak’s secret handshake to perfect grilling. You’ll sear the steak 3 minutes on one side, flip it for another 3 minutes, then move it to indirect heat for 2 minutes per side. This rhythm creates a crusty exterior and juicy interior.
You’ll want a steak at least an inch thick and a thermometer to nail your desired doneness, whether that’s rare or well done.
How Many Minutes per Side for Tri-Tip?
You’ll want to grill your tri-tip for about 6-7 minutes per side over indirect heat, flipping it regularly to cook evenly.
After reaching your target internal temp, sear it over direct heat for 2-3 minutes on each side to get a nice crust.
Should I Close the Grill When Cooking Tri-Tip?
Yes, you should close the grill when cooking tri-tip. Closing the lid helps keep the temperature steady and traps heat and smoke, which flavors the meat better and cooks it faster.
When searing over direct heat, keep the lid closed to form a nice crust while keeping the inside juicy. Just remember to flip every 6-7 minutes during indirect cooking and monitor the internal temperature with a good thermometer.
Conclusion
Grilling tri-tip is easier than you might think, especially when you follow these simple steps. With the right cut, seasoning, and two-zone heat setup, you’ll achieve a juicy, flavorful steak every time. Remember, flipping at the right moments and hitting those perfect internal temps is key.
Resting your tri-tip lets the juices settle, making each bite melt in your mouth like a warm hug on a chilly day. By mastering how long to grill tri-tip and following these tips, you’ll consistently enjoy tender, delicious results. Enjoy your delicious creation and the satisfaction that comes with perfectly grilled tri-tip!