How to Use an Air Fryer in 7 Easy Steps
To use your air fryer in 7 easy steps, first choose one that fits your needs and preferences for healthy cooking.
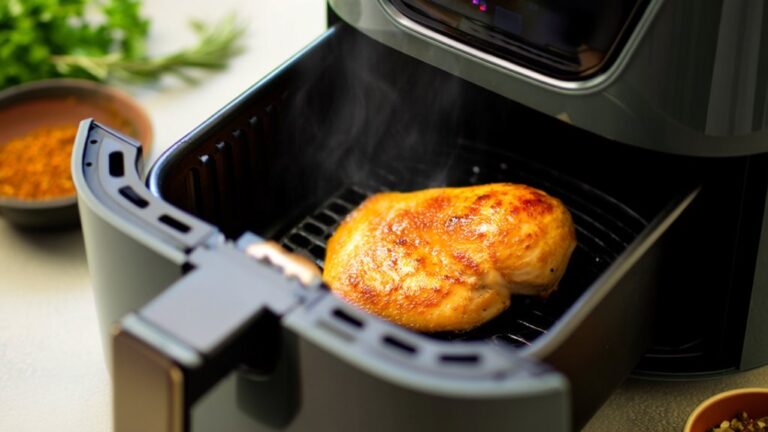
Preheat it to around 400°F for a few minutes to guarantee even cooking.
Pick high smoke point oils like avocado for a light coating.
Season your food lightly and arrange it in a single layer, avoiding overcrowding.
Shake or flip midway through cooking and watch the time closely to prevent overcooking.
Keep going for tips that’ll help you perfect every meal.
Key Takeaways
- Choose an air fryer size and model that fits your cooking needs and household size.
- Preheat the air fryer to about 400°F for 3-5 minutes before adding food.
- Lightly coat food with high smoke point oil and season with herbs or spices.
- Arrange food in a single layer without overcrowding, shaking or flipping halfway through cooking.
- Check doneness visually, avoid overcooking, and let food rest briefly after cooking for best texture.
Choose the Right Air Fryer

How do you pick the perfect air fryer for your kitchen? First, consider the size and capacity that fit your cooking style and household. If you’re cooking for one or two, manual models might be ideal since they offer basic functions and are easy to use.
But if you often prepare meals for a family of four to eight, a dual air fryer lets you cook multiple dishes at once, saving time and effort. Next, think about features. Digital models come with preset programs that simplify cooking, allowing you to choose settings for different foods without guesswork.
Manual models may lack presets but offer straightforward control. Don’t forget to compare preheat options and other features that suit your culinary needs. By weighing these factors—size, capacity, cooking style, and features—you’ll confidently choose the right air fryer that matches your kitchen and lifestyle perfectly.
Preheat Your Air Fryer

Before you start cooking, preheating your air fryer is key to getting that perfect crisp and even cooking. Aim for around 400°F and let it heat for 3-5 minutes, just like you would with a traditional oven.
This quick step not only improves texture but also cuts down your overall cooking time.
Importance of Preheating
Although it might seem like an extra step, preheating your air fryer is essential for achieving evenly cooked, crispy dishes. Preheating guarantees proper heat distribution, setting the right temperature before cooking starts. This step helps you get peak cooking results by reducing overall cooking time and preventing uneven cooking.
When the air fryer reaches the ideal temperature, your food sears quickly, locking in moisture and creating that perfect golden-brown finish. Skipping preheating risks soggy, undercooked spots because food won’t cook evenly if the temperature isn’t consistent from the start. Taking just 3-5 minutes to preheat ensures your air fryer is ready to deliver crispy, delicious meals every time, maximizing both texture and flavor with precise temperature control.
Preheat Temperature Guidelines
When you preheat your air fryer to 400°F for about 5 minutes, you set the stage for perfectly crispy and evenly cooked meals. Preheating guarantees your food hits the correct temperature immediately, boosting cooking efficiency and delivering superior cooking results. Skipping preheat often causes longer cooking times and uneven texture, which you want to avoid.
Even if your model lacks a preheat button, simply set the temperature and timer manually.
| Preheat the Air | Correct Temperature | Even Cooking |
|---|---|---|
| 400°F is ideal | Guarantees superior heat | Avoid uneven texture |
| Saves time | Promotes searing | Perfectly crispy |
| Boosts efficiency | Prevents overcooking | Enhances flavor |
Time Needed to Preheat
Preheating your air fryer usually takes about 3 to 5 minutes at 400°F, setting the perfect stage for cooking. This step guarantees ideal cooking by promoting even cooking and perfect crispiness. Not all air fryer models come with a preheat button, so you might need to set the timer manually.
Skipping preheating can lead to longer cooking times and unevenly cooked food, which diminishes the overall quality. Preheating is especially important when cooking meats, as it enhances the searing process, locking in juices and flavor.
Taking these few minutes to preheat helps you get the best results from your air fryer, regardless of the model, making your meals crispier and more delicious every time.
Select the Best Cooking Oil

When selecting cooking oil for your air fryer, choose ones with high smoke points like avocado or coconut oil to prevent burning. You only need a light coating or spritz to get that perfect crispy texture without excess oil.
Using an oil mister can help you apply just the right amount evenly for the best results.
Best Oils for Frying
Choosing the right oil can make a big difference in your air frying results, especially since oils with high smoke points like avocado, refined peanut, and canola oil handle heat better without burning. To get the best oils for frying, consider these options:
- Avocado oil (520°F) – ideal for healthy cooking and crisp, flavorful dishes.
- Refined peanut oil (450°F) – great for high-heat frying with neutral taste.
- Canola oil (400°F) – budget-friendly with a mild flavor and good smoke point.
- Olive oil and coconut oil – use with care; olive oil adds flavor but has a moderate smoke point (375°F), while coconut oil offers unique taste and health benefits but lower smoke point (350°F).
Avoid low smoke points to prevent off-flavors and harmful compounds.
Oil Usage Tips
Since air fryers require less oil than traditional frying, you can achieve crispy, flavorful results with just a light coating. When following oil usage tips, choose oils with high smoke points like avocado or coconut oil to handle the heat without burning. Using less oil makes air frying a healthier cooking option while still delivering crispy textures.
Instead of cooking sprays, which can leave residue, use an oil mister for controlled application. Spritzing your food lightly enhances flavor and crispiness without overdoing the quantity of oil. Remember, a small amount is enough—air fryers circulate hot air efficiently, so you don’t need to soak your food.
This approach guarantees you get great taste and texture with minimal oil, making your meals both delicious and healthier.
Season Your Ingredients Properly
Although air frying intensifies natural flavors, you’ll want to season your ingredients thoughtfully to bring out the best taste and texture. To season your ingredients properly, keep these tips in mind:
- Experiment with herbs and spices to enhance the flavor profile and tailor dishes to your personal taste preferences.
- Use marinades to add depth and complexity; they improve both flavor and tenderness before air frying.
- Remember that air frying often needs less seasoning than traditional methods since flavors concentrate during cooking.
- Lightly coat ingredients with oil to achieve a crispy texture while maintaining a healthier approach.
Avoid Overcrowding the Basket
After seasoning your ingredients properly, you’ll want to make certain they cook evenly and get that perfect crisp. One key step is to avoid overcrowding the air fryer basket. Overcrowding blocks proper air circulation, which leads to uneven cooking and soggy results.
Arrange your food in a single layer with space around each piece to guarantee ideal crispiness. This spacing lets hot air flow freely, improving cooking quality throughout the basket. If you have a larger air fryer, you might fit more food without overcrowding, but always monitor your air fryer’s capacity.
When cooking larger quantities, it’s best to cook in batches rather than stuffing the basket. Doing so maintains the integrity of the cooking process and helps you achieve consistent cooking times. Remember, giving your ingredients room to breathe in the air fryer basket is essential for the best results every time.
Shake or Flip Food Midway
A simple shake or flip of your food halfway through cooking can make all the difference in achieving even browning and crispiness. When you shake or flip the food in the basket, you redistribute it, preventing sticking and burning while promoting an even cooking process.
Follow these steps for best results:
- Pause the air fryer at about half the cooking time.
- Carefully remove the basket and shake it gently or use tongs to flip the food.
- Return the basket to the air fryer and resume cooking.
- Repeat if necessary for larger batches to maintain consistent texture.
Monitor Cooking Time Closely
Shaking or flipping your food midway helps guarantee even cooking, but keeping a close eye on the overall cooking time is just as important. Monitoring cooking time confirms your meal reaches the desired doneness without overcooking, which can cause dryness or an unpleasant texture. While most recipes provide specific cooking times, you’ll need to adjust them based on food thickness, cooking temperature, and personal preference.
Set a timer to manage cooking intervals and remind yourself to check the food regularly. This way, you can gauge its progress and decide if it needs a bit more time or if it’s ready to come out. Checking a few minutes before the recommended cook times helps avoid surprises and confirms even cooking.
Frequently Asked Questions
How Do You Use an Air Fryer for Beginners?
To master air fryer basics, start by preheating your device and selecting proper temperature settings—usually 350-400°F. Avoid common mistakes like overcrowding the basket to guarantee even cooking. Use cooking times from healthy recipes and experiment with air fryer accessories to expand your meal prep options.
Prioritize food safety by cleaning removable parts regularly. Explore recipe ideas that suit your taste and follow cleaning tips to keep your air fryer in top shape.
Do You Put Air Fryer Liners in the Basket or Under the Basket?
You put air fryer liners inside the basket, right beneath your food. This basket placement guarantees proper air circulation, which is key for even cooking and crispiness. Using liners helps with cooking safety by preventing drips and protecting the basket’s surface, making cleaning easier.
Choose perforated liner materials compatible with your cooking temperature. Avoid placing liners under the basket, as it hinders airflow and affects air fryer maintenance and food preparation quality.
What Foods Cannot Be Cooked in an Air Fryer?
Certain foods challenge your air fryer’s cooking capabilities. Moisture rich foods like grapes or watermelon release water, causing soggy results. Heavy batters and wet breading drip and damage the basket.
Cheese dishes melt messily unless carefully wrapped. Leafy greens and delicate pastries can fly around or burn due to fast air circulation. Whole roasts don’t cook evenly in the compact basket.
Knowing these cooking limitations helps you avoid air fryer frustrations.
Why Are People Getting Rid of Air Fryers?
You’re likely seeing people ditch air fryers because of limited kitchen space and dissatisfaction with food quality or cooking time. If your cooking preferences lean toward traditional methods, you might find recipe limitations frustrating. Health concerns also play a role, as some prefer fresher ingredients or less oil.
Plus, cleaning methods can be tedious, affecting user experience. Despite air fryer safety and energy efficiency benefits, these factors often outweigh the convenience for many.
Conclusion
Using your air fryer is like steering a ship—you need the right tools, careful timing, and attention to detail to reach delicious results.
By choosing the right air fryer, preheating it, selecting the best oil, seasoning well, avoiding overcrowding, shaking or flipping food, and monitoring cooking time, you’ll navigate your cooking journey smoothly.
Stick to these steps, and you’ll master your air fryer like a seasoned captain mastering the seas of flavor. With these tips, using your air fryer becomes an easy and enjoyable experience every time.