How Long to Cook Chicken Breast in an Air Fryer in 7 Easy Steps
Preheat your air fryer to 375°F for a crispy finish.
When cooking chicken breast in an air fryer, it’s important to prepare the meat properly. Pound the chicken breasts to even thickness and brush them lightly with olive oil, then season generously.
Cook small breasts for 7–10 minutes, medium for 10–12, and larger pieces for 12–16 minutes, flipping halfway through.
Use a thermometer to confirm they reach 165°F internally. Let them rest for 5–10 minutes before slicing.
Keep going to discover tips that make your chicken juicy and flavorful every time.
Key Takeaways
- Preheat air fryer to 360°F or 375°F for 3-5 minutes based on chicken thickness for even cooking and crispiness.
- Pound chicken to ½–¾ inch thickness and season both sides with olive oil, garlic powder, salt, and pepper for flavor.
- Cook small breasts 7–10 minutes, medium 10–12 minutes, and large 12–16 minutes, flipping halfway through cooking.
- Use an instant-read thermometer to confirm internal temperature reaches 165°F for safe consumption.
- Rest chicken 5–10 minutes covered loosely with foil before slicing against the grain to keep it juicy and tender.
Preheat Your Air Fryer
Before you start cooking, preheat your air fryer to 360°F (182°C) or 375°F (190°C), depending on the thickness of your chicken breast. Preheating your air fryer is essential to guarantee even cooking and achieve juicy chicken breasts with a crispy exterior. Typically, the preheating time lasts about 3 to 5 minutes, but you should always check your specific air fryer model’s instructions, as times can vary.
While preheating, avoid overcrowding the air fryer basket; too many pieces can block heat circulation, leading to uneven cooking and reduced moisture retention. Setting the air fryer to 360 degrees F is ideal for thinner chicken breasts, while thicker cuts benefit from the higher temperature of 375 degrees F. Proper preheating ensures your chicken cooks evenly throughout, balancing cooking times perfectly and locking in moisture.
Taking these steps sets the stage for tasty, well-cooked chicken every time.
Prepare the Chicken Breast
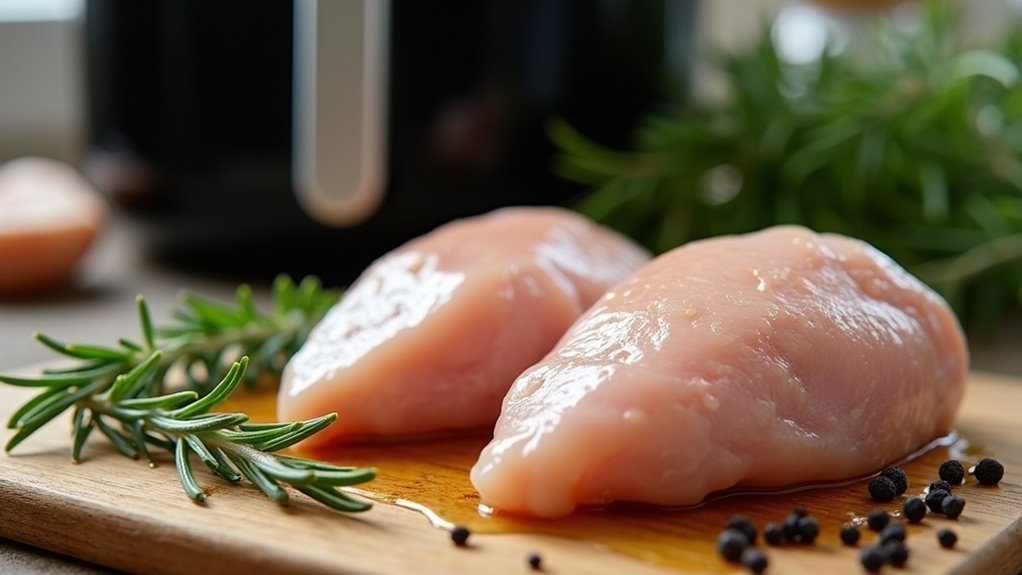
When you prepare the chicken breast, start by gathering boneless skinless chicken breasts along with olive oil and your favorite seasonings like garlic powder, salt, and black pepper. To guarantee even cooking, pound the chicken breasts to a uniform thickness of about ½ to ¾ inch. This step helps the meat cook evenly and prevents dryness.
Next, let the chicken reach room temperature before cooking, which promotes better texture. Brush each piece lightly with olive oil to keep the chicken moist during cooking and to help your seasoning mix stick better. Season both sides thoroughly with your chosen spices, making sure you achieve an even coating for maximum flavor.
Taking these steps to prepare the chicken breast properly sets the foundation for juicy, flavorful results when you air fry them. By preparing the chicken breast with care, you guarantee even cooking and a delicious outcome every time.
Seasoning and Oil Application
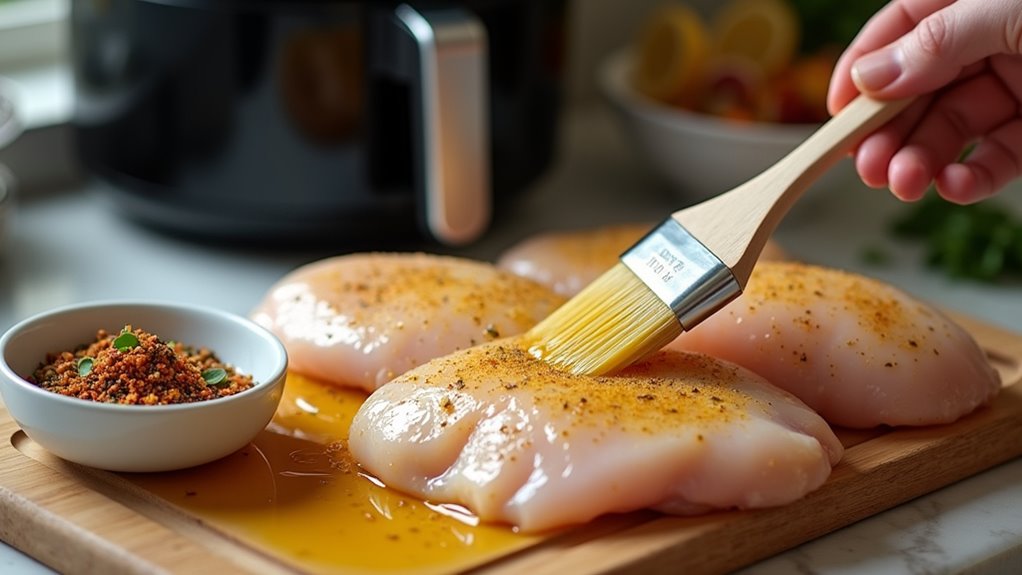
Start by brushing each chicken breast with 2 teaspoons of olive oil to help the seasonings stick and keep the meat moist during cooking. Before you season, lightly pound the chicken breast to an even thickness; this guarantees it cooks evenly and absorbs flavors better.
Next, season one side with your preferred spices—garlic powder, salt, black pepper, and for extra flavor, add paprika or cayenne pepper. Place the seasoned side down in the air fryer basket, then season the other side while it’s in place. This approach maximizes flavor on both sides and keeps the chicken breast flavorful throughout.
The oil not only helps the seasoning adhere but also locks in moisture, preventing dryness. By following this seasoning and oil application method, your chicken breast will cook evenly and come out juicy and delicious every time in your air fryer.
Cooking Time for Different Sizes
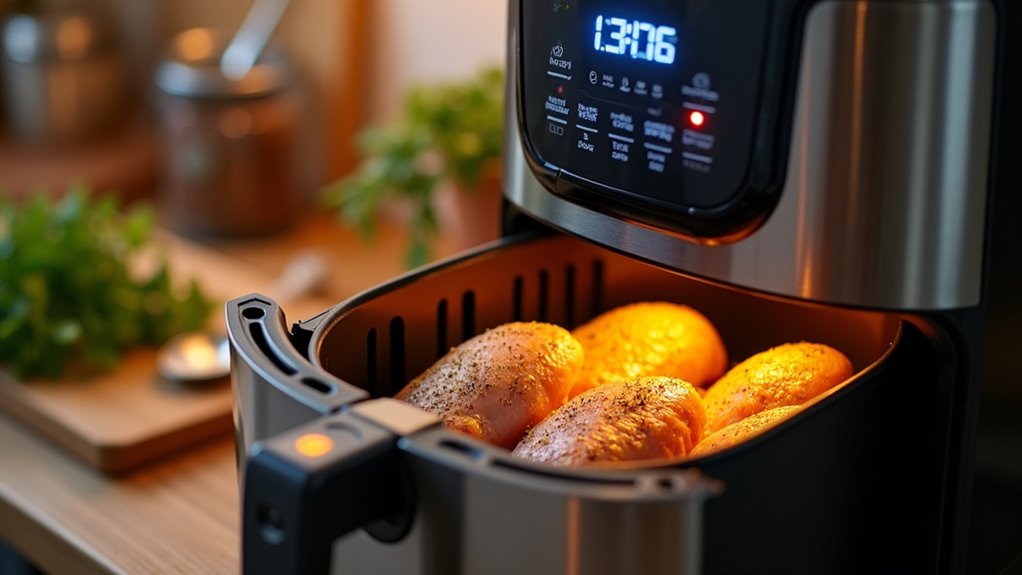
Applying oil and seasoning evenly sets the stage for cooking your chicken breast perfectly in the air fryer. When it comes to cooking time, size matters. Small chicken breasts, weighing 5–7 oz, need about 7–10 minutes at 375°F.
Medium chicken breasts, 8–10 oz, require 10–12 minutes, while large chicken breasts over 11 oz typically take 12–16 minutes. To guarantee even cooking and a golden exterior, flip the chicken halfway through the process.
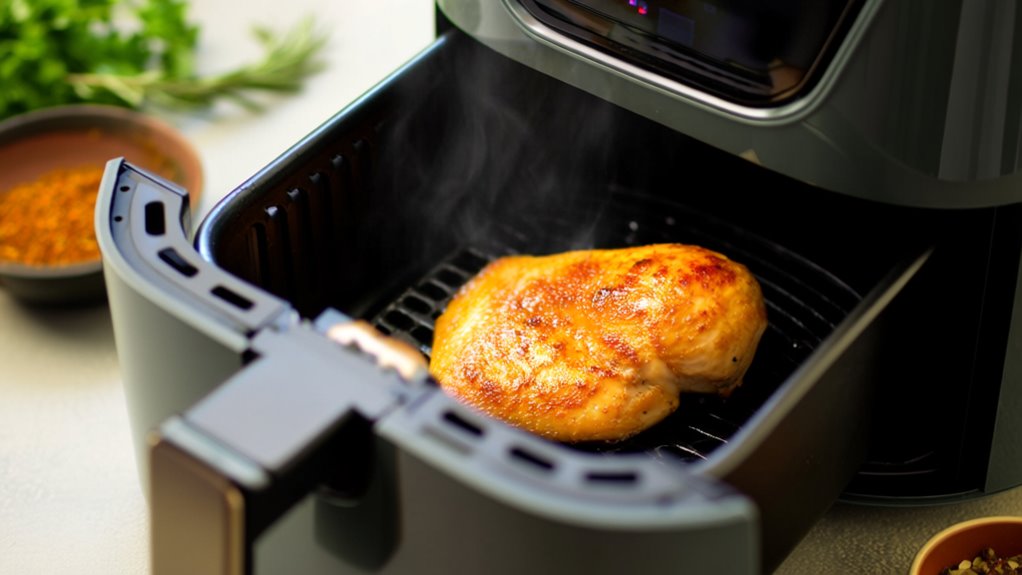
Always use an instant-read thermometer to check the internal temperature, making certain it reaches 165°F for safe consumption. This step is essential, as cooking times can vary slightly depending on your air fryer model. By adjusting cooking time based on the size of your chicken breast and verifying doneness with a thermometer, you’ll consistently enjoy juicy, perfectly cooked chicken straight from your air fryer.
Flipping for Even Cooking
You’ll want to flip your chicken breasts about halfway through cooking, usually after 6 minutes, to guarantee both sides get crispy and evenly cooked. Flipping not only helps with even cooking but also spreads the seasoning for better flavor.
Just make certain not to overcrowd the basket so air can circulate properly while you flip.
When to Flip
Although air fryers cook food evenly by circulating hot air, flipping the chicken breast halfway through the cooking time guarantees both sides get that perfect golden crisp.
When cooking chicken breast in air fryer, you’ll want to flip the chicken after about 6 minutes for a medium breast, adjusting slightly for size: 5-6 minutes for small, 7-8 for large. This guarantees even cooking and a crispy exterior while locking in moisture inside for juicy chicken.
Make certain to season well before placing the breast in the air fryer basket, leaving enough space for ideal air circulation. After flipping, use an instant-read thermometer to check the internal temperature; it should reach at least 165°F for safe, delicious results every time.
Benefits of Flipping
Flipping chicken breasts halfway through cooking in your air fryer gives you multiple benefits. It guarantees even cooking, promoting consistent doneness throughout each breast. By flipping, you achieve a uniformly crispy exterior on both sides, enhancing texture.
This simple action also improves seasoning distribution, making every bite flavorful. Additionally, flipping helps maintain the juiciness of your chicken breasts by preventing one side from drying out during the cooking time. It reduces the risk of the meat sticking to the air fryer basket, making removal easier once done.
Flipping Technique Tips
Master the art of turning your chicken breast halfway through cooking to achieve an even, golden crust on both sides. Flip the chicken around the 6-minute mark in your air fryer to promote even cooking and a crispy exterior. Use tongs to gently flip without piercing the meat, keeping your chicken tender and juicy.
Before cooking, verify even thickness by pounding the chicken breast; this helps reduce cooking time and guarantees uniform doneness. Once flipped, give a gentle shake if using a basket-style air fryer to prevent sticking and redistribute heat. Always check the internal temperature after flipping—165°F ensures juicy chicken that’s safe to eat.
Following these flipping technique tips will help you consistently enjoy perfectly cooked, flavorful chicken breast every time.
Checking Internal Temperature
How do you know when your chicken breast is perfectly cooked in an air fryer? The key is checking the internal temperature. Use a reliable meat thermometer and insert it into the thickest part of the chicken breast, avoiding any bone.
This guarantees even cooking and helps you avoid undercooked or dry meat. Since chicken must reach at least 165°F (74°C) to be safe to eat, always check multiple spots, especially if your chicken breast has uneven thickness.
Cooking times vary—small breasts take 7-10 minutes, medium 10-12, and large 12-16 minutes at 375°F (190°C)—but temperature is the true indicator. For juicy chicken, consider carryover cooking: remove the chicken once it hits 155-160°F (68-71°C) and let it rest.
The residual heat will raise its internal temperature to the safe zone without overcooking, resulting in tender, flavorful chicken every time.
Resting Before Serving
After air frying your chicken breast, you’ll want to let it rest for 5 to 10 minutes before serving. This step lets the juices redistribute, keeping the meat juicy and flavorful.
Cover it loosely with foil to retain heat without making the skin soggy.
Importance of Resting
When you let your chicken breast rest for 5 to 10 minutes after cooking, you give the juices a chance to redistribute, making the meat more tender and flavorful. Resting your air fryer chicken breast properly helps prevent juices from running out when you slice, ensuring a juicy chicken breast every time.
To maximize results:
- Rest for 5 minutes covered loosely with aluminum foil to retain warmth without steaming.
- Let rest off the heat; internal temperature may rise slightly, enhancing safety and tenderness.
- Avoid cutting immediately to keep those flavorful juices locked inside.
Resting Time Guidelines
Although it’s tempting to dig in right away, letting your chicken breast rest for 5 to 10 minutes before serving locks in moisture and flavor. During this resting time, the juices redistribute throughout the meat, resulting in a juicier, moister air fryer chicken.
To keep the chicken warm without steaming, cover the chicken loosely with aluminum foil. Resting also allows carryover cooking to raise the internal temperature by a few degrees, ensuring it safely reaches 165°F. Avoid slicing immediately after cooking, as cutting too soon causes the juices to run out, leaving the chicken dry.
Frequently Asked Questions
How Long Do You Cook Chicken Breast in the Air Fryer?
You’ll cook chicken breast in the air fryer for 7 to 16 minutes, depending on size, at around 375°F. Flip halfway for even cooking. Season or use your favorite marinade recipes to boost flavor.
Adjust temperature settings if needed, but always check food safety by confirming it hits 165°F internally. This cooking technique is perfect for meal prep, offering juicy, tender results. Serve with veggies or salads for a quick, healthy meal.
How to Cook a Chicken in an Air Fryer?
To cook chicken in an air fryer, start by marinating or seasoning it with your favorite spice blends for bold flavor combinations. Take advantage of air fryer benefits like crispy skin and healthier alternatives by using minimal oil. Adjust cooking times based on size, flipping halfway for even crispiness.
Experiment with recipe variations, and use your air fryer for quick meal prep. Serve with fresh sides or sauces to enhance your dish and enjoy every bite!
How Long Do I Cook Chicken in an Air Fryer at 400 Degrees?
Wondering how long to cook chicken in an air fryer at 400 degrees? You’ll want to cook it for 12-15 minutes, flipping halfway for juicy chicken every time. Use air fryer tips like preheating and even thickness for consistent cooking.
Season your chicken well, experiment with flavor combinations, and check the internal temp for air fryer safety. These cooking techniques make meal prep easy and healthy meals delicious.
Conclusion
Now that you know how to cook chicken breast perfectly in your air fryer, you’re ready to enjoy juicy, flavorful meals every time. Remember, “slow and steady wins the race”—taking your time with seasoning, flipping, and checking the temperature guarantees the best results.
Follow these simple steps, and you’ll have a delicious, healthy dinner on the table in no time. Cooking chicken breast in an air fryer is quick, easy, and ensures a tender, juicy outcome.
Mastering how long to cook chicken breast in an air fryer will transform your meal prep and elevate your dinner game. Happy cooking!