10 Easy Steps to Make Pulled Chicken in the Oven
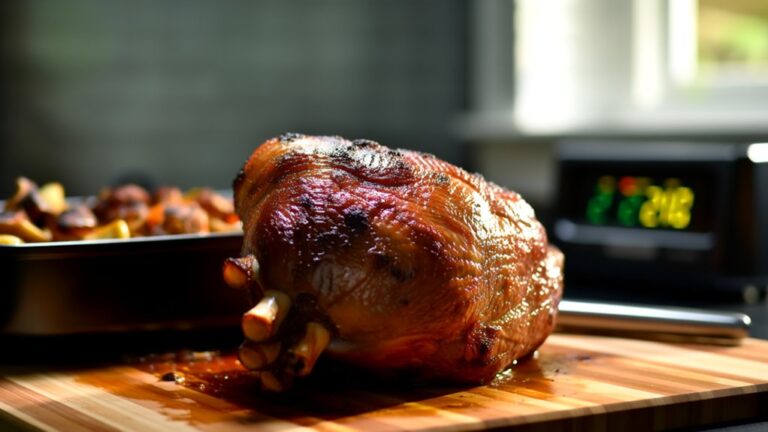
Start by choosing boneless, skinless chicken thighs for juiciness, perfect for making pulled chicken in the oven.
Season them well with salt, pepper, and garlic powder to enhance flavor.
Preheat your oven to 300°F and prepare a baking dish with broth to keep the chicken moist.
Cover tightly with foil and bake for 3 to 4 hours until tender.
Let it rest, then shred using forks or a mixer.
Store airtight or use in meals.
Keep going to uncover tips that make your pulled chicken even better.
Key Takeaways
- Preheat oven to 300°F and season 3 pounds of boneless, skinless chicken thighs with salt, pepper, garlic powder, and optional smoked paprika.
- Place chicken in a foil-lined baking dish, add 1/4 cup broth or water, cover tightly with foil to retain moisture.
- Bake covered for 3 to 4 hours until internal temperature reaches 165°F, then let chicken rest for 10-15 minutes.
- Shred chicken using two forks or a stand mixer paddle attachment for easy, consistent results.
- Store pulled chicken in an airtight container with cooking liquid, and reheat gently with added broth to maintain juiciness.
Gather Your Ingredients and Equipment
To make pulled chicken, you’ll want to start by gathering about 3 pounds of boneless, skinless chicken thighs or breasts for the best flavor and moisture. Chicken thighs are often preferred because they stay juicy and tender when cooked. Next, collect your seasonings—garlic powder, onion powder, sea salt, and fresh ground black pepper are excellent choices to enhance the taste.
Prepare a baking dish, ideally a 9×13-inch glass or ceramic one, which guarantees even cooking and easy cleanup. Before placing the chicken in the baking dish, trim any excess fat with a clean knife. Have some broth, stock, or water ready to add moisture during baking, as this prevents the chicken from drying out.
With these ingredients and tools, you’re set for the next steps.
Choose the Best Chicken Cuts for Pulled Chicken
Although you can use different cuts of chicken for pulled chicken, choosing boneless, skinless chicken thighs will give you the best results due to their higher fat content and richer flavor. These thighs help keep your chicken moist and tender throughout cooking, making them ideal for any pulled chicken recipe.
While boneless, skinless chicken breasts are an option, they’re leaner and can dry out quickly if not watched carefully. Avoid wings and legs since they have less meat and too many bones, complicating shredding.
If you want to mix thighs and breasts, make sure all pieces are either boneless or bone-in to guarantee even cooking. Also, pick high-quality chicken like air-chilled or free-range to boost flavor and avoid excess moisture from injected solutions.
Preheat Your Oven to the Right Temperature
When you’re ready to cook your pulled chicken, make sure your oven is preheated to 300°F (149°C) for the best results. This lower temperature allows the chicken to cook slowly, breaking down fibers and keeping the meat tender and juicy. It’s important to preheat your oven fully, so give it at least 15-20 minutes to reach 300°F before putting your chicken in.
Since oven temperatures can vary, using an oven thermometer helps you confirm the heat is spot on. If you want to speed things up, you can preheat your oven to 400°F, but be careful to adjust the cooking time to avoid drying out the chicken. Sticking to 300°F generally guarantees the most flavorful and moist pulled chicken every time.
Season Your Chicken Perfectly
Once your oven is ready, the next step is to season your chicken perfectly. Start by lightly coating the chicken with avocado oil; this helps the seasonings stick and adds healthy fats. Then, season your chicken generously with salt, black pepper, and garlic powder for a solid flavor base.
To elevate the taste, consider adding smoked paprika or onion powder. If you’re using BBQ sauce, don’t hesitate to slather it on the chicken before baking—it keeps the meat moist and infuses it with rich flavor. After seasoning, let the chicken sit for at least 15 minutes so the spices can penetrate deeply.
This simple step guarantees your pulled chicken will be juicy, flavorful, and ready for your next delicious recipe.
Prepare Your Baking Dish for Cooking
To make cleanup a breeze and keep your chicken from sticking, line your baking dish with aluminum foil. Covering the dish with foil also helps lock in moisture, ensuring your pulled chicken stays juicy.
This simple step sets the stage for perfectly tender results. Reynolds Wrap can safely be used in the oven at typical cooking temperatures because of its excellent heat resistance.
Lining the Baking Dish
Three simple steps will make lining your baking dish easy and effective. Start by placing a double layer of aluminum foil in the dish to prevent sticking and simplify cleanup.
Next, tightly secure the foil edges around the dish to trap steam and preserve moisture while cooking. Finally, for extra flavor, consider adding sliced onions or garlic beneath the chicken before sealing.
| Step | Purpose | Tip |
|---|---|---|
| Double Layer | Full coverage | Prevents moisture loss |
| Secure Edges | Trap steam & moisture | Guarantees tender chicken |
| Add Aromatics | Enhance flavor | Use onions or garlic |
Following these steps guarantees your pulled chicken stays juicy and your baking dish stays clean.
Foil Covering Benefits
Why cover your baking dish with foil before cooking pulled chicken? The foil covering benefits are significant—it helps lock in moisture retention, preventing your chicken from drying out. This means you’ll get tender, juicy pulled chicken every time.
Using a double layer of foil creates a tight seal, trapping steam inside that speeds up cooking and guarantees even heat distribution. This even cooking avoids hot spots so your chicken cooks thoroughly and consistently. Plus, foil traps seasonings and juices, resulting in a more flavorful final dish.
Another bonus? Cleanup is a breeze since foil keeps the baking dish clean by preventing direct contact with the chicken. So, don’t skip this simple step to enhance both texture and taste in your pulled chicken recipe.
Add Moisture to Keep Chicken Juicy
Although cooking chicken at a low temperature helps retain moisture, you’ll also want to add a bit of liquid—like 1/4 cup of chicken broth or water—to the baking dish before sealing it tightly with foil. This small addition creates steam during cooking, which keeps the chicken juicy and tender.
The chicken broth not only adds moisture but also enhances flavor, making your pulled chicken even more delicious. To maintain that juicy texture, avoid skipping this step. You can also baste the chicken with its own juices or broth halfway through cooking for extra moisture.
These techniques work together to prevent dryness, ensuring your pulled chicken is moist and flavorful every time you bake it.
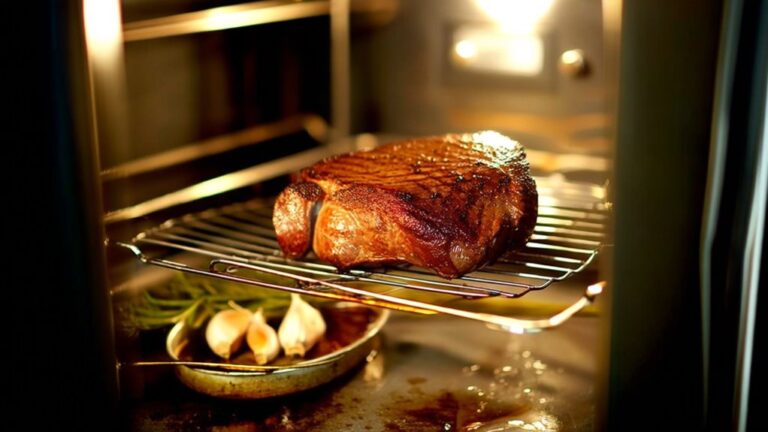
Cover and Bake the Chicken Properly
Once you’ve added moisture to keep the chicken juicy, the next step is to cover and bake it properly to lock in that tenderness. Start by placing a cup of broth or water in the baking dish to create steam, which prevents the chicken from drying out. Then, cover with foil tightly, ideally using a double layer, to seal in the moisture.
Bake the chicken low and slow at 300°F for 3 to 4 hours—this gentle heat breaks down the meat, making it perfect for shredding. By following these steps, you guarantee the chicken stays tender and juicy, making your shredded chicken flavorful and easy to pull apart once it’s done baking.
Check for Doneness and Rest the Chicken
A key step in making pulled chicken is checking for doneness to confirm it’s cooked safely and perfectly tender. Use a meat thermometer to verify the internal temperature reaches at least 165°F (74°C). If it’s not quite there, pop the chicken back in the oven and check every 5 minutes.
Once done, don’t rush—rest the chicken covered for 10-15 minutes. This resting period lets the juices redistribute, keeping the meat moist and preventing dryness when you shred the chicken. After it’s rested, you’ll find the chicken much easier to pull apart with a fork, confirming it’s tender and ready for your favorite pulled chicken recipe.
Taking these steps guarantees your pulled chicken is juicy and delicious every time.
Shred the Chicken With Your Preferred Method
Since the chicken is still warm after resting, shredding it becomes much easier and results in tender, juicy pieces. Choosing the right shredding methods can make a big difference in your pulled chicken’s texture and moisture.
Shredding warm chicken ensures tender, juicy pieces and improves the texture and moisture of your pulled chicken.
Here are three popular ways to shred chicken:
- Use a stand mixer with a paddle attachment for quick, consistent shredded chicken without much effort.
- Opt for two forks to manually pull apart the meat, giving you more control over the size of the pieces.
- Combine both methods—start with forks for larger chunks, then finish with the mixer for fine shredding.
Store or Use Your Pulled Chicken in Recipes
Although pulled chicken tastes great fresh, storing it properly lets you enjoy it later without losing moisture or flavor. To store pulled chicken, place it in an airtight container with some cooking liquid to keep it juicy. It’ll stay fresh in the fridge for up to 4 days or freeze well for 3 months.
When you’re ready to use it, portion the chicken into 1 or 2 cup servings—ideal for various recipes like tacos, salads, or casseroles. For extra flavor, mix your pulled chicken with BBQ or enchilada sauce before storing or serving. Reheat gently in a skillet or microwave with a splash of broth to maintain moisture.
Pulled chicken’s versatility lets you create quick, delicious meals across different cuisines.
Frequently Asked Questions
How to Do Pulled Chicken in the Oven?
To make pulled chicken in the oven, you’ll want to cook boneless, skinless chicken thighs low and slow at about 300°F. Coat them with your favorite BBQ sauce or seasoning, then cover tightly with foil to keep moisture in.
Bake for 3-4 hours until the chicken’s super tender. Let it rest a bit before shredding with a fork. Mix the shredded meat back into the juices for extra flavor, and you’re ready to serve!
How Do You Cook Chicken for Pulled Chicken?
Oh, it’s super complicated—you just roast the chicken at 300°F for 3-4 hours until it’s fall-apart tender. You’ll want to use boneless, skinless thighs or breasts, season them well, and add a splash of broth to keep things juicy.
Cover tightly with foil so it doesn’t dry out. After resting, shred the chicken—you’ll find it’s way easier and more flavorful than you’d expect.
How to Cook Chicken so It Can Be Pulled?
To cook chicken so it can be pulled easily, you’ll want to cook it low and slow to keep it tender. Use boneless, skinless thighs or breasts, season them well, then bake covered at around 300°F for 3-4 hours. This gentle cooking breaks down the fibers, making shredding simple.
After resting, shred the chicken with forks or a mixer, mixing in the juices to keep it moist and flavorful.
Is It Better to Bake Chicken at 350 or 400 in the Oven?
If you want your chicken to feel like it’s sunbathing in a sauna, go for 350°F—slow and steady wins the tenderness race. But if you’re into a quick, crispy tan with juicy insides, 400°F is your hot spot.
Just remember, whether you’re a slowpoke or a speedster, make sure your chicken hits 165°F internally. No one wants undercooked drama on their plate!
Conclusion
Congrats, you’ve officially mastered the art of oven-pulled chicken—because who needs a slow cooker or fancy gadgets when you’ve got an oven and a sprinkle of patience?
Now you can impress your friends with shredded poultry that’s almost too easy to believe. Just don’t blame me when they ask for the recipe every week.
Remember, it’s not just chicken; it’s your new secret weapon for effortless culinary glory.
With these 10 easy steps to make pulled chicken in the oven, you’re well on your way to creating delicious meals that are quick, tender, and full of flavor. Enjoy your newfound kitchen fame!