How Long to Cook Garlic Bread in Air Fryer in 7 Easy Steps
To cook garlic bread in your air fryer, start by choosing fresh bread like a baguette.
Spread softened garlic butter evenly over the slices to ensure rich flavor. This method guarantees a crispy, delicious garlic bread every time.
Preheat your air fryer to 350°F before placing the bread inside.
Arrange the slices in a single layer, making sure they don’t overlap for even cooking.
Cook fresh bread for 4-5 minutes and frozen bread for 5-6 minutes at 380°F.
Check for crispiness and adjust the time if necessary to achieve your preferred texture.
Serve the garlic bread immediately for the best taste or store any leftovers properly.
Keep following these steps and tips to perfect your garlic bread every time.
Key Takeaways
- Preheat the air fryer at 350°F for 3-5 minutes to ensure even cooking of the garlic bread.
- Spread softened garlic butter evenly on thick bread slices (about 2 inches thick) for best flavor absorption.
- Cook fresh garlic bread at 350°F for 4-5 minutes until crispy and golden brown.
- For frozen garlic bread, increase temperature to 380°F and cook for 5-6 minutes without thawing.
- Arrange bread slices in a single layer with small gaps, avoiding overlap for even air circulation and crispiness.
Selecting the Right Bread for Air Fryer Garlic Bread
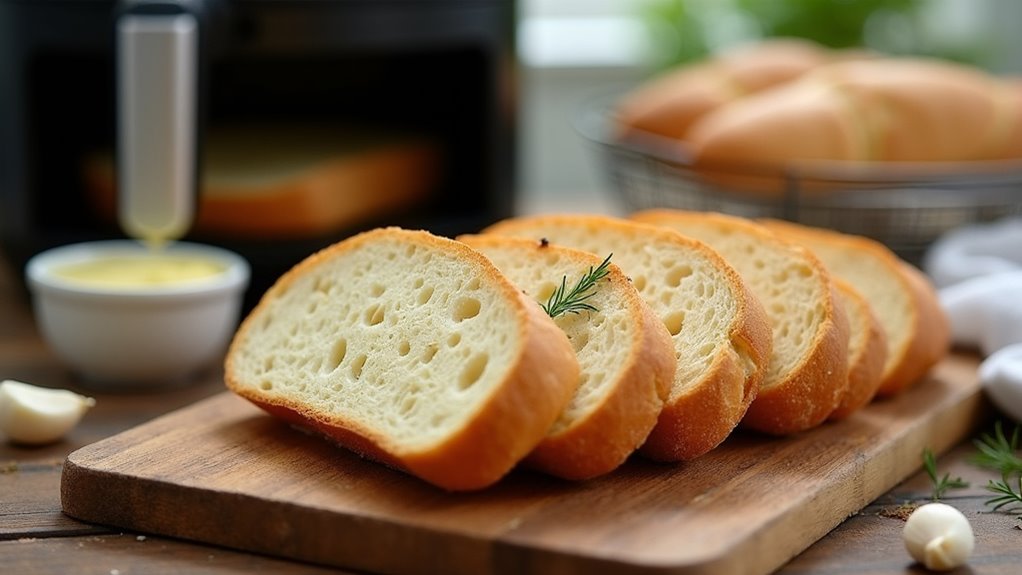
Choosing the right bread is key to making perfect garlic bread in your air fryer. Opt for fresh types of bread like baguette or ciabatta, which develop a crispy exterior while staying soft inside. Slice the bread into thicker pieces—about 2 inches—to let the garlic butter mixture soak in and guarantee even cooking.
You can also try frozen garlic bread options such as Texas toast; they cook quickly without thawing. Experiment with different bread types like hamburger buns or Italian bread to find your favorite flavor and texture. Just be sure to avoid overly dense bread, as it won’t crisp up properly in the air fryer, leaving you with a less satisfying result.
Preparing the Garlic Butter Spread

Once you’ve picked your bread, the next step is preparing the garlic butter spread that brings all the flavor together. Start by using softened unsalted butter to make spreading easier. Then, blend all ingredients thoroughly to create a smooth, flavorful mixture.
Your garlic butter should include:
- Freshly minced garlic for that authentic taste and punch.
- Grated parmesan cheese to add a rich, savory depth.
- A mix of dried parsley, Italian seasoning, and red pepper flakes for a hint of herbaceous and spicy notes.
Make sure to spread the garlic butter evenly on your bread so every bite is delicious. The key is to blend all ingredients well, ensuring the flavors meld perfectly before you move on to cooking.
Preheating Your Air Fryer Properly
To get the best results, you should preheat your air fryer for about 3 to 5 minutes at 350°F before cooking your garlic bread. Preheating air fryer guarantees even heat distribution, helping to attain a crispy exterior and soft interior. While most air fryer models benefit from preheating, always consult manual to check if your model requires it.
Remember to avoid opening basket during this time to maintain temperature and avoid prolonging cooking time. Preheating ensures proper heat distribution before cooking starts, preventing soggy, undercooked spots.
| Step | Temperature | Duration |
|---|---|---|
| Set air fryer | 350°F for garlic bread | Preheat for 3-5 minutes |
| Consult manual | Check model specifics | May skip preheating |
| Avoid opening basket | Retain heat | Maximize cooking time |
| Achieve texture | Crispy exterior | Soft interior |
| Start cooking | After preheating | Best ideal cooking results |
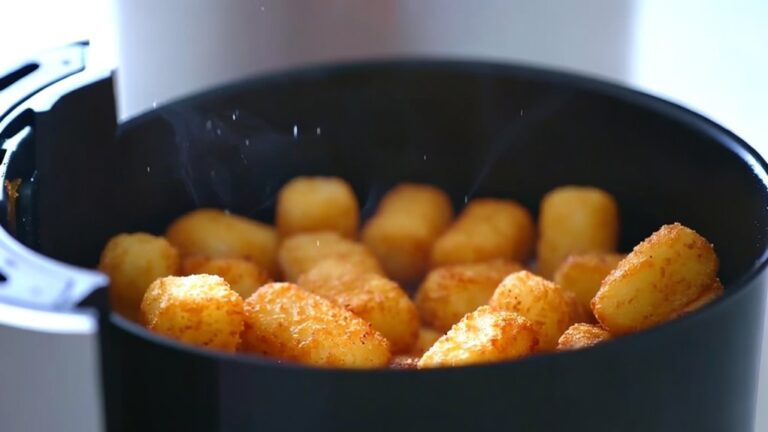
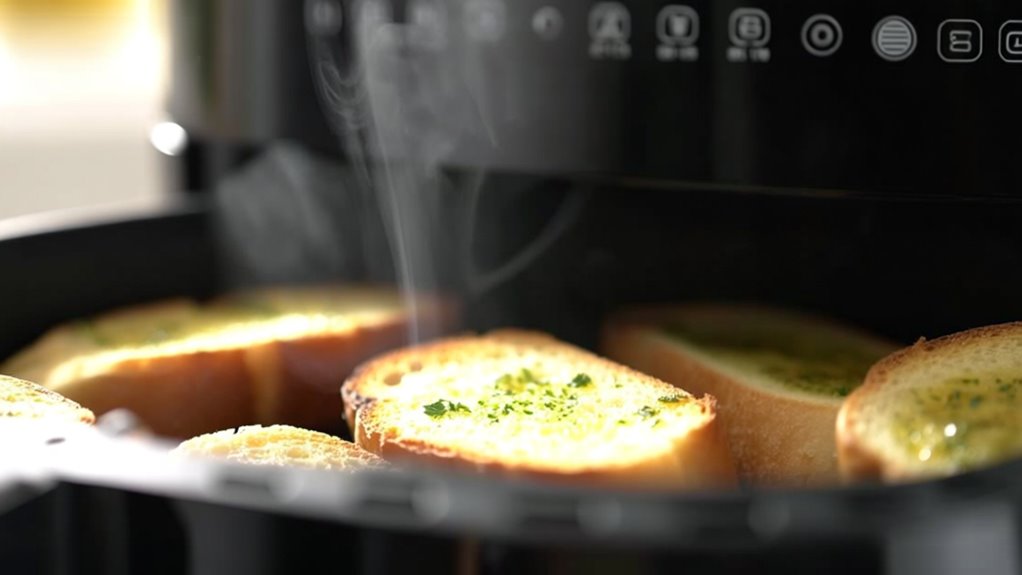
Arranging the Bread in the Air Fryer Basket
You’ll want to arrange your garlic bread slices in a single layer inside the air fryer basket to guarantee even cooking and crispiness. Proper arranging the bread in the air fryer basket is key to achieving that perfect crispy texture. Avoid overlapping slices since it blocks hot air circulation, causing uneven toasting.
If your basket’s space is limited, consider cooking in batches for best results. Remember, preheat the air fryer for the best outcome, unless you’re using frozen garlic bread, which can go in directly.
Keep these tips in mind:
- Place slices with a small gap to promote even cooking.
- Don’t stack or overlap to maintain crispiness.
- Cook in batches if needed for consistent results.
This method guarantees your air fryer garlic bread turns out perfectly every time.
Cooking Time and Temperature Settings
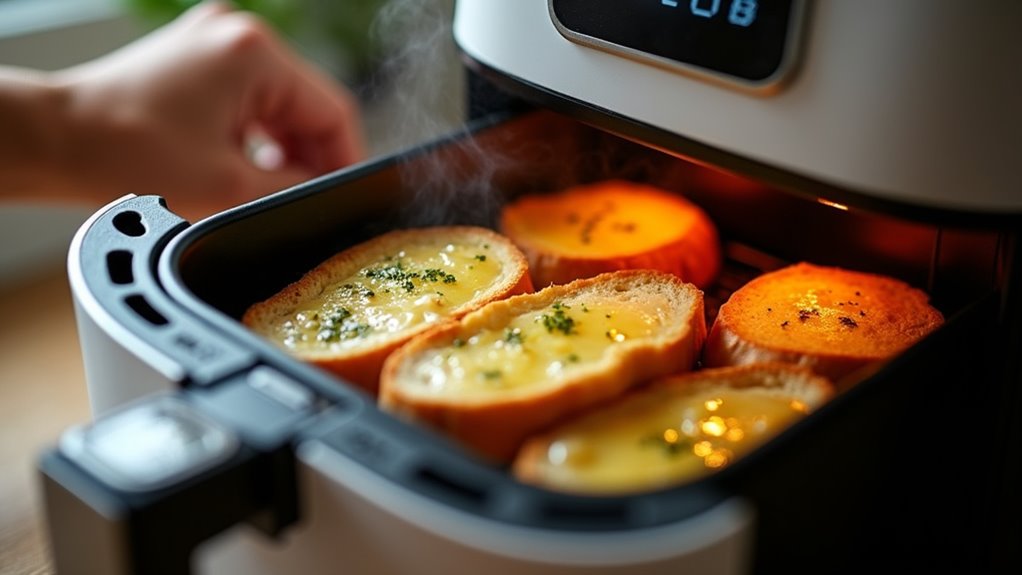
Although air fryer models vary, cooking fresh garlic bread at 350°F for 4-5 minutes usually gives you a crispy, golden result. This temperature setting works best to bring out the rich flavor of fresh garlic while achieving that perfect golden brown crust. If you’re adding cheese, toss it on during the last 1-2 minutes so it melts beautifully without burning.
For frozen garlic bread, increase the temperature to 380°F and cook for 5-6 minutes without preheating. Keep in mind that cooking time may slightly vary depending on your air fryer’s model and bread thickness. To get consistent results, avoid overcrowding the basket—air fryers work best when air can circulate freely.
This method makes garlic bread easy to make with a deliciously crispy finish every time.
Checking for Crispiness and Adjusting Time
Once your garlic bread’s cooked, take a close look for a golden-brown color and feel the texture to see if it’s crispy enough. If it’s not quite there, you can add a minute or two to the cooking time, but keep an eye on it to avoid burning.
Remember to check each slice individually since air circulation affects how evenly they crisp up.
Visual Crispiness Indicators
Visual cues are your best guide when cooking garlic bread in an air fryer. Look for a golden-brown color on the surface, signaling it’s crispy and ready. If your bread still looks pale or soft after the initial cooking time, add more time in 1-minute increments until it reaches that perfect crispiness.
Remember, fresh bread usually crisps up in 5-7 minutes at 350°F, while frozen garlic bread may need 6-8 minutes at 380°F. For evenly cooking, avoid stacking slices and flip the bread halfway through to brown both sides nicely.
Here’s what to watch for:
- Golden-brown color indicating doneness
- Evenly cooking by flipping halfway
- Adjusting cooking time based on bread type (fresh vs. frozen)
Texture Testing Methods
When you finish the initial cooking time, you’ll want to check if your garlic bread has reached the right level of crispiness. Start by visually inspecting for a golden brown color on the edges. Then, gently tap the bread’s surface—the firm crunchy sound signals perfect texture.
If it’s not crispy enough, add 1-2 minutes of additional cooking time in your air fryer but watch it closely. Remember, the thickness of bread slices affects how long to cook garlic bread: thicker slices need longer, thinner slices less. Let the bread rest a minute to enhance crispiness before serving.
| Thickness of Bread Slices | Cooking Time (minutes) |
|---|---|
| Thin | 4-5 |
| Medium | 5-6 |
| Thick | 6-8 |
| Initial Texture Check | Golden brown, firm crunchy |
| Additional Cooking Time | 1-2 (if needed) |
Time Adjustment Tips
Although air fryer settings vary, you should start by cooking garlic bread at 350°F for about 5 minutes to get a lightly crispy texture. When using a preheated air fryer, arrange the garlic bread in a single layer to guarantee even cooking. If you prefer a softer interior, check after 3 minutes and adjust cook time accordingly.
For frozen garlic bread, lower the heat to 340°F and increase cook time to 7-8 minutes.
Keep these time adjustment tips in mind:
- Monitor closely during the last minutes to avoid burning due to varying cooking efficiency.
- Extend cooking by 1-2 minutes if you want a crunchier crispy texture.
- Avoid overcrowding to maintain ideal airflow and consistent results.
Adjusting cook time based on your air fryer helps achieve perfect garlic bread every time.
Serving and Storing Your Garlic Bread
To enjoy your garlic bread at its best, serve it warm alongside pasta, soups, or salads for a delicious complement. If you have any leftover garlic bread, store it in an airtight container in the refrigerator for up to three days to keep it fresh.
For longer storage, freeze garlic bread in a zippered bag, making sure it’s at room temperature first to avoid ice crystals. Label the bag with the freezing date to track freshness.
When reheating garlic bread, the air fryer is your best bet—heat frozen bread at 340°F for 5-7 minutes or refrigerated bread for 2-3 minutes. This method guarantees peak flavor and texture, making your pairing with pasta or soups even better.
Frequently Asked Questions
How Long to Cook Garlic Bread in the Air Fryer?
You’ll want to cook fresh garlic bread in your air fryer at 350°F for about 5-7 minutes, depending on how crispy you like it.
If you’re using frozen garlic bread, crank it up to 380°F and cook for 5-6 minutes—no preheating needed.
Just make sure to place the bread in a single layer to cook evenly. Keep an eye on it since air fryers can vary in heat and timing.
How Long to Heat up Garlic Bread in an Air Fryer?
You’ll want to heat your garlic bread just right—usually around 5 to 6 minutes if it’s frozen, at 380°F. But if it’s fresh, cut that down to 3 to 5 minutes at 350°F. Don’t worry about preheating; just pop it in!
For a melty twist, add cheese in the last minute. Remember, lay the bread flat in a single layer to keep it crispy and delicious.
How to Cook Frozen Garlic Bread Slices in an Air Fryer?
To cook frozen garlic bread slices in your air fryer, simply place them in a single layer inside the basket—don’t overcrowd it. Set the temperature to 380°F and air fry for about 5-6 minutes without preheating.
If you want cheesy garlic bread, add cheese after 5 minutes and cook for another 1-2 minutes. Your bread should come out golden, crispy, and ready to enjoy right away!
Conclusion
Now that you know how to make perfect garlic bread in your air fryer, you’re all set to enjoy crispy, flavorful bites in no time.
Did you know air fryers can cook food up to 30% faster than traditional ovens? That means less waiting and more savoring.
Just follow these simple steps, and you’ll have golden, delicious garlic bread ready to impress family and friends every time!
For the best results, remember the ideal cooking time and temperature when making garlic bread in an air fryer. This ensures you get that perfect crispy texture and rich flavor every time.