How You Can Grill Brisket Perfectly Every Time
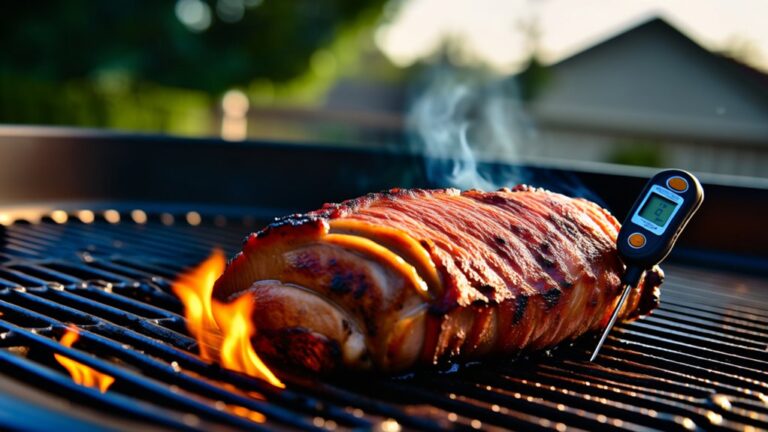
To grill brisket perfectly every time, start with a reliable smoker preheated to 225°F and a quality meat thermometer to track the temperature.
Choosing the right brisket is essential; opt for a whole packer brisket weighing around 12-14 pounds. Season it simply with kosher salt and coarse black pepper for the best flavor.
Smoke the brisket until the internal temperature reaches about 165°F. At this point, wrap it in butcher paper to get through the stall. This helps retain moisture and enhances tenderness.
Continue smoking until the internal temperature hits 202°F.
Then, let the brisket rest before slicing against the grain. Following these steps closely will help you master brisket grilling with ease and great flavor—there’s plenty more to explore to enhance your grilling skills.
Key Takeaways
- Preheat your smoker to a steady 225°F using quality charcoal and wood like mesquite for consistent smoke and heat.
- Select a whole packer brisket, 12-14 pounds with good marbling and an adequate fat cap for juiciness and flavor.
- Apply a thin binder, then liberally season with kosher salt and coarse black pepper for a classic Texas-style rub.
- Smoke until the brisket hits 165°F, wrap in butcher paper during the stall, then continue to 202-205°F for tenderness.
- Let the brisket rest before slicing against the grain with a sharp knife and serve with classic sides and tangy sauces.
Essential Tools for Smoking Brisket
To smoke brisket perfectly, you’ll need the right tools to keep temperatures steady and flavors on point. A reliable smoker, like the CampChef Woodwind Pro, is key for maintaining a consistent 225°F temperature, essential for a tender smoked brisket. You’ll also want a high-quality meat thermometer, such as the Thermapen ONE, to get accurate internal temperature readings, ensuring your brisket reaches ideal doneness without guesswork.
Using butcher paper to wrap your brisket during the stall phase helps retain moisture and develop a flavorful bark. Don’t forget an external thermometer to monitor grate temperature, keeping your cooking environment stable throughout the process. Finally, a sharp chef’s knife is necessary for slicing the brisket against the grain, giving you tender, presentable cuts.
With these tools at your disposal, you’ll be well-equipped to smoke brisket perfectly every time.
Choosing the Right Brisket Cut
Having the right tools sets the stage, but choosing the right brisket cut makes all the difference in flavor and tenderness. When selecting your brisket, go for a whole packer brisket that includes both the point and flat muscles to balance flavor and moisture. Opting for a Prime grade brisket guarantees superior fat marbling, which helps keep the meat juicy and tender during grilling.
Aim for a brisket weighing between 12-14 pounds if you’re feeding a crowd, as that typically serves 24-28 people. Pay close attention to the fat cap—it should be thick enough to baste the meat naturally but not so thick that it overwhelms. A good fat cap and marbling are essential for a flavorful final product.
Always buy from reputable butchers or suppliers to assure quality and freshness. Choosing the right cut sets you up perfectly before you even reach the stage of applying your brisket rub.
Preparing and Seasoning Your Brisket
Three simple ingredients form the foundation of a great brisket rub: Morton Kosher salt, coarse ground black pepper, and a binder like yellow mustard or Zesty Gold BBQ Sauce. When preparing and seasoning your brisket, start by selecting a whole packer cut weighing 12-14 pounds, which includes both the point and flat muscles to keep it moist and flavorful. Choose a Prime grade for the best fat marbling, and look for a good fat cap to guarantee juiciness during grilling.
Before applying the rub, spread a thin layer of your chosen binder over the brisket’s surface. This helps the seasoning stick better. Use about ½ cup Morton Kosher salt and 3 tablespoons of coarse ground black pepper, applying it liberally on both sides for balanced flavor.
Proper preparing and seasoning set the stage for a perfectly grilled brisket that’s tender and delicious.
Setting Up Your Smoker Correctly
One of the most important steps in grilling brisket perfectly is setting up your smoker correctly. Start by preheating your smoker to 225°F and let it stabilize for 15-20 minutes to verify consistent cooking conditions. Use charcoal briquettes combined with mesquite wood for that ideal flavor during smoking a brisket.
Arrange unlit charcoal in a “K” shape to maintain proper airflow and steady heat throughout the cook. Don’t forget to place a water pan inside your smoker—3-4 liters for cooks under eight hours, or 5-6 liters for longer sessions. This helps with temperature stability and develops a nice smoke ring on your brisket.
To monitor progress, keep an eye on both the internal temperature of the brisket and the grate temperature using reliable external thermometers. This prevents fluctuations and assures even cooking. Proper setup is key to mastering brisket every time.
Optimal Smoking Temperatures and Timing
Once your smoker is set up and stable at 225°F, maintaining that temperature consistently during the cook is key to developing the brisket’s flavor and texture. The best cooking temperature allows for even heat distribution, guaranteeing your brisket smokes evenly throughout the smoking time. Plan on about 8 hours until the brisket reaches an internal temperature of 165°F.
At this point, you may hit the stall phase, where the temperature plateaus between 145°F and 165°F. To push through, wrapping the brisket in butcher paper is common, adding an extra 5-8 hours of cooking until it hits 202°F, reaching ideal tenderness. Overall, expect a total smoking time of 12-18 hours, depending on size and thickness.
Managing the Stall and Wrapping Techniques
Although the stall can be frustrating, understanding how to manage it with proper wrapping techniques is key to achieving a tender brisket. The stall occurs as the brisket’s temperature plateaus between 145°F and 165°F due to moisture evaporation.
To push through this, you’ll want to wrap the brisket tightly in butcher paper or aluminum foil once it hits around 165°F. This traps heat and moisture, speeding up the cooking while preserving juiciness.
Here’s a quick guide to managing the stall:
| Temperature Range | Action |
|---|---|
| 145°F – 165°F | Expect the stall |
| ~165°F | Wrap the brisket |
| Wrapped Phase | Retains moisture |
| 165°F – 202°F | Cook for 5-8 hours |
| After 202°F | Remove and rest brisket |
Monitoring Internal Temperature Accurately
How can you be certain your brisket’s internal temperature is on point throughout the cook? The key is monitoring internal temperature accurately with a reliable meat thermometer like the Thermapen ONE. This tool gives you precise readings, so you know exactly when to adjust your grill or wrap your brisket.
Aim for an initial internal temperature of 165°F before wrapping the brisket in butcher paper to push through the stall phase. Keep a close eye during the stall (145°F to 165°F) to avoid overcooking or drying out your meat. Your goal is a final internal temperature between 202°F and 205°F, which guarantees a perfect brisket—tender, juicy, and flavorful.
Regular checks save you from guesswork and help you nail the timing. With proper temperature monitoring, you’ll consistently grill brisket that’s spot-on delicious every time.
Resting Your Brisket for Perfect Tenderness
Because the juices need time to redistribute, you should rest your brisket for at least an hour after cooking to guarantee maximum tenderness and flavor. Resting allows the meat fibers to relax and reabsorb moisture, preventing dry slices when you cut into it.
For the best results, wrap your brisket in foil and a towel, then place it in an insulated cooler for 2 to 3 hours. This method keeps it warm and moist, while the internal temperature can rise slightly, reaching that perfect range between 195°F and 205°F.
By giving your brisket this resting time, you enhance both tenderness and juiciness, making every bite satisfying. Remember, skipping this step means you risk losing the flavorful juices that make brisket so special.
Techniques for Slicing Smoked Brisket
When slicing your smoked brisket, always cut against the grain to keep the meat tender and easy to chew. Start with the flat section before separating the point for individual slices, paying attention to the ideal thickness for serving.
Keeping these techniques in mind will help you get the most flavor and texture from every slice.
Grain Direction Importance
Mastering the grain direction is key to slicing smoked brisket that’s tender and easy to chew. You need to identify how the muscle fibers run, as the brisket’s flat and point sections each have their own grain direction. Always slice against the grain to break down those fibers, ensuring every bite is tender.
Start with the flat and work downward, cutting across the fibers rather than along them. Using a sharp knife is essential here—it allows you to make clean, precise slices without tearing the meat, which improves both texture and presentation. For the best experience, aim for about ¼-inch thick slices.
This thickness balances tenderness and flavor, while showing off that beautiful smoke ring you worked hard to achieve.
Separating Point Flat
Now that you know how to slice against the grain for tender brisket, it’s time to separate the point from the flat. Look for the natural seam of fat that divides these two sections—it’s your guide. Use a sharp chef’s knife and gently cut along this fat line to keep the meat tender enough and avoid tearing.
- Identify the fat seam between point and flat
- Slice carefully with a sharp knife, applying gentle pressure
- Cut the flat against the grain into ¼ inch slices for tenderness
- Use thinner slices or cubes for the point, ideal for burnt ends
Letting your brisket rest before slicing guarantees the juices redistribute, making each bite juicy and flavorful. Serve both parts together to enjoy the rich contrast in texture and taste.
Ideal Slice Thickness
Choosing the right slice thickness is key to enjoying smoked brisket at its best. Aim for slices about 1/4 inch to 1/2 inch thick to strike the perfect balance between tenderness and flavor. Cutting against the grain is essential; slicing with the grain can make your brisket tough and chewy.
Before slicing, make certain to rest for at least 20 minutes so the juices redistribute, keeping each slice moist and flavorful. Use a sharp chef’s knife or an electric knife for clean, precise cuts that preserve the brisket’s texture and presentation. Don’t forget to separate the point and flat sections first, as their different textures deserve individual attention when slicing.
This technique guarantees every bite highlights the brisket’s rich, smoky profile perfectly.
Serving Suggestions and Flavor Enhancements
When serving brisket, you’ll want to highlight its rich, smoky flavors by adding just the right touches. A sprinkle of coarse sea salt on sliced brisket instantly enhances its natural taste and deepens that signature smoke flavor.
To complement and elevate your brisket, consider these serving suggestions and flavor boosts:
Enhance your brisket with classic sides, tangy sauces, and flavorful garnishes for a truly memorable meal.
- Pair with classic sides like coleslaw, baked beans, or cornbread for balanced, hearty meals.
- Drizzle Zesty Gold BBQ Sauce or a vinegar-based sauce over the slices to add tang and moisture.
- Offer pickles and sliced onions as garnishes; their acidity and crunch cut through the brisket’s richness.
For a gourmet twist, serve smoky chipotle aioli or horseradish cream on the side to intensify flavor complexity.
These simple yet effective enhancements guarantee every bite of your grilled brisket is unforgettable.
Frequently Asked Questions
What Is the Best Way to Cook a Brisket on the Grill?
The best way to cook a brisket on the grill is to keep the temperature low and steady around 225°F. You’ll want to season it simply with salt and pepper, then smoke it slowly for several hours.
Once it hits around 165°F, wrap it to retain moisture, and continue cooking until it reaches about 202°F. Don’t forget to let it rest before slicing against the grain for maximum tenderness and flavor.
How Do You Keep Brisket Moist on the Grill?
Did you know brisket can take up to 12 hours to cook properly? To keep it moist, you’ll want to maintain a steady grill temperature around 225°F and avoid drying it out.
Wrapping your brisket in butcher paper once it hits 165°F locks in juices during the stall. Also, cooking fat side up lets the fat baste the meat naturally, while resting it for an hour after grilling redistributes those flavorful juices.
Should I Wrap My Brisket in Foil on the Grill?
Yes, you should wrap your brisket in foil on the grill once it hits about 150-165°F. Wrapping helps keep it moist and speeds up cooking by pushing through the stall phase.
Just remember, foil traps moisture but can soften the bark, so if you want a crispier crust, consider butcher paper instead.
Either way, make sure it reaches 195-204°F internal temperature for tender, juicy results before resting.
What Is the 3 2 1 Brisket Rule?
They say patience is a virtue, and with the 3 2 1 brisket rule, you’ll see why. You start by smoking your brisket unwrapped for 3 hours to develop flavor and bark.
Then, you wrap it and cook for 2 hours to keep it moist and push through the stall. Finally, you unwrap it for 1 hour to firm up the bark and finish cooking.
It’s a reliable way to get tender, juicy brisket every time.
Conclusion
By following these steps, you’ll nail brisket every time. Imagine you’re at a family BBQ, and everyone raves about your perfectly smoked, tender brisket—it’s the star of the meal. With the right tools, seasoning, and patience, you’ll turn brisket into a crowd-pleaser.
Remember, practice makes perfect, so don’t be discouraged if your first try isn’t flawless. Keep at it, and soon you’ll be the go-to grill master among your friends. Mastering how to grill brisket perfectly every time takes dedication, but the results are well worth it.